Imagine a perfectly seared steak, boasting a tantalizing crust and a juicy, tender interior, all achieved from the comfort of your kitchen, even without a traditional stovetop. An electric skillet is a versatile and often underestimated tool for achieving just that. Far from being a mere convenience appliance, an electric skillet, when used correctly, can deliver restaurant-quality results for your favorite cuts of beef.
This comprehensive guide will walk you through everything you need to know, from selecting the ideal steak to executing the perfect sear and ensuring ultimate tenderness. Whether you’re a seasoned home cook or new to the world of electric skillets, prepare to unlock the secrets to a flawless steak dinner.
Choosing the Right Steak for Your Electric Skillet
The foundation of a great steak begins with selecting the right cut. For pan-searing in an electric skillet, certain characteristics will yield the best results.
Aim for steaks that are 1 to 1.5 inches thick. This thickness allows for a beautiful, deep crust to develop on the exterior without overcooking the inside. Thinner cuts tend to cook too quickly, making it challenging to achieve a good sear while maintaining desired doneness.
Some of the best steak cuts for electric skillet cooking include:
- Ribeye: Known for its rich marbling, which melts into the meat, creating an incredibly tender and flavorful steak.
- New York Strip: A lean yet flavorful cut with a firm texture that sears wonderfully, developing a crisp exterior.
- Sirloin: A versatile and generally more affordable option that offers good flavor and tenderness, especially when cooked to medium-rare or medium.
- Flat Iron: A flavorful cut from the shoulder that is surprisingly tender when cooked correctly, often considered a “poor man’s filet mignon.”
Look for steaks with even marbling, which are the small flecks of fat distributed throughout the muscle. This marbling is key to both flavor and juiciness. Freshness is also paramount; choose cuts that are bright red with minimal blemishes.
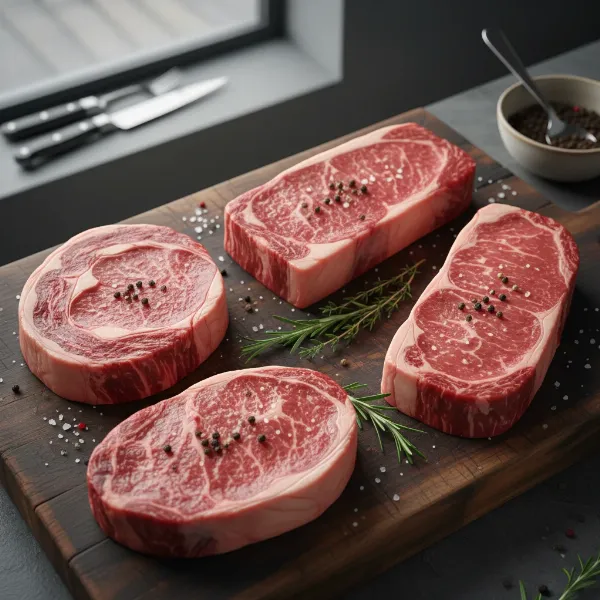 Various premium steak cuts like ribeye and New York strip, showcasing excellent marbling.
Essential Preparation Steps for Searing Success
Proper preparation is crucial for achieving that coveted steakhouse-quality sear and ensuring an evenly cooked, juicy steak.
First, remove your steaks from the refrigerator about 20 to 30 minutes before cooking. Allowing the meat to come closer to room temperature promotes more even cooking throughout the steak, preventing a cold center and overcooked exterior. For thicker cuts, some experts even recommend up to an hour or more.
Next, and critically, pat your steaks thoroughly dry with paper towels. Any excess moisture on the surface of the steak will steam rather than sear, hindering the formation of a beautiful, caramelized crust. A dry surface is essential for the Maillard reaction, which is responsible for the rich brown color and complex flavors of a seared steak.
Generously season both sides of your steak with kosher salt and freshly ground black pepper. Don’t be shy with the seasoning; a good amount helps to develop flavor and form the crust. You can also experiment with additional seasonings like garlic powder, paprika, or fresh herbs such as rosemary and thyme for added aromatic depth.
Finally, choose a high smoke point oil for searing. Oils like avocado oil, canola oil, grapeseed oil, or vegetable oil are ideal as they can withstand the high temperatures needed for searing without burning and imparting off-flavors. Avoid butter or olive oil for the initial sear, as they have lower smoke points and will burn quickly. Butter can be added later for basting.
Mastering the Electric Skillet: Preheating and Searing
The key to a perfect electric skillet steak lies in proper preheating and effective searing technique.
Preheating Your Electric Skillet:
Turn your electric skillet to a high setting, aiming for a temperature between 375°F to 400°F. Allow the skillet to preheat for at least 5-10 minutes, or until the indicator light signifies it has reached the set temperature. You can test its readiness by flicking a few drops of water onto the surface; if they sizzle and evaporate quickly, the skillet is hot enough. This high heat is vital for initiating the Maillard reaction and forming that desired crust.
Once your skillet is adequately hot, add about 1-2 tablespoons of your chosen high smoke point oil. Swirl the oil around to coat the bottom evenly. The oil should shimmer, but not smoke excessively.
Searing the Steak:
Carefully place your seasoned, room-temperature, and patted-dry steak into the hot skillet. Do not overcrowd the pan. If cooking multiple steaks, work in batches to ensure there’s enough space between them for proper airflow. Overcrowding will lower the skillet’s temperature and cause the steaks to steam rather than sear.
Press the steak down gently with tongs to ensure full contact with the hot surface. Sear undisturbed for 3 to 5 minutes on the first side, depending on the steak’s thickness and your skillet’s heat distribution. Resist the urge to move or flip the steak too early, as this can prevent the formation of a deep, even crust.
Once a rich, golden-brown crust has formed, flip the steak using tongs. Sear the opposite side for another 3 to 5 minutes. For an even more consistent crust and faster cooking, some chefs advocate flipping the steak every 30-60 seconds after the initial sear. This technique continuously exposes new surfaces to the heat, promoting uniform browning.
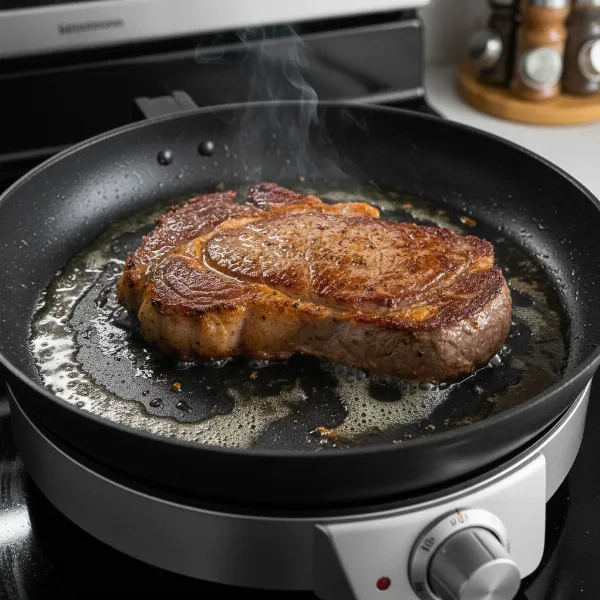 A thick steak actively searing in an electric skillet, developing a golden-brown crust.
Achieving Your Desired Doneness
After achieving a beautiful sear on both sides, it’s time to bring the steak to your preferred level of doneness.
Reduce the electric skillet’s heat to medium-low, typically around 250°F to 275°F. If your electric skillet has a lid, cover it during this phase to help the steak cook through more evenly.
The most accurate way to check your steak’s doneness is by using an instant-read meat thermometer. Insert the thermometer into the thickest part of the steak, avoiding any bone. Here are the target internal temperatures (remember that the steak’s temperature will rise a few degrees during resting):
- Rare: 120°F to 125°F
- Medium-Rare: 130°F to 135°F
- Medium: 140°F to 145°F
- Medium-Well: 150°F to 155°F
- Well Done: 160°F and above
While a meat thermometer is recommended, experienced cooks might use the “touch test” as an alternative gauge. A rare steak will feel soft and squishy, while a well-done steak will be firm with little give.
During the final minutes of cooking, you can enhance the flavor by basting the steak. Add a pat of butter, along with fresh herbs like rosemary or thyme, and a crushed garlic clove to the skillet. As the butter melts, continuously spoon it over the steak, infusing it with aromatic richness.
The Critical Rest Period and Flavor Enhancements
Once your steak reaches the desired internal temperature, remove it immediately from the electric skillet. This next step is often overlooked but is absolutely essential for a truly juicy and tender steak: resting.
Transfer the cooked steak to a cutting board or a warm plate and tent it loosely with aluminum foil for 5 to 10 minutes. During cooking, the muscle fibers in the steak contract, pushing the juices to the center. Resting allows these juices to redistribute evenly throughout the meat, resulting in a more succulent and flavorful bite. Cutting into the steak too soon will cause these precious juices to run out onto the plate, leaving you with a drier piece of meat.
As your steak rests, you can create a simple pan sauce using the flavorful drippings left in the skillet. Deglaze the pan with a splash of wine, broth, or even water, scraping up any browned bits (fond) from the bottom. Whisk in a knob of butter and any leftover herbs for a quick, delicious accompaniment.
Serve your perfectly cooked electric skillet steak with your favorite sides, such as roasted vegetables, mashed potatoes, or a fresh salad. A drizzle of the pan sauce or a dollop of compound herb butter can further elevate the experience.
Common Mistakes to Avoid for a Flawless Steak
Even with the best intentions, several common pitfalls can sabotage your electric skillet steak. Being aware of these can help you avoid them.
- Cooking cold steak directly from the refrigerator: While some unconventional methods exist, for typical electric skillet searing, cold steak cooks unevenly, leading to an overcooked exterior and a cold, undercooked interior. Always allow it to come to room temperature first.
- Not preheating the skillet enough: A lukewarm skillet will fail to create a proper sear, resulting in a gray, unappetizing crust and a less flavorful steak. Ensure your skillet is screaming hot before the steak goes in.
- Overcrowding the skillet: Adding too many steaks at once drops the temperature of the skillet significantly, causing the meat to steam instead of sear. Cook in batches if necessary.
- Not patting the steak dry: Moisture is the enemy of a good sear. Always blot your steak dry before seasoning and cooking.
- Using low smoke point oils: Oils like regular olive oil or butter will burn at high searing temperatures, producing smoke and imparting bitter flavors to your steak. Stick to high smoke point oils for the initial sear.
- Cutting immediately after cooking: Skipping the resting period is one of the quickest ways to lose all the delicious juices, leaving you with a dry steak. Patience is a virtue here.
Conclusion
Cooking a mouthwatering steak in an electric skillet is not only convenient but also incredibly rewarding. By carefully selecting your cut, meticulously preparing it, mastering the high-heat searing technique, and allowing for that crucial rest, you can consistently achieve a perfectly cooked, juicy steak with an irresistible crust. An electric skillet truly empowers you to bring the steakhouse experience right into your own kitchen.
Now that you’re armed with these expert tips, are you ready to transform your next meal into a culinary masterpiece with your electric skillet?
Frequently Asked Questions
Can I use butter to sear my steak in an electric skillet?
|
Our Picks for the Best Electric cooker in 2026
As an Amazon Associate I earn from qualifying purchases.
|
||
| Num | Product | Action |
|---|---|---|
| 1 | Dezin Hot Pot Electric with Steamer Upgraded, Non-Stick Sauté Pan, Rapid Noodles Electric Pot, 1.5L Mini Pot for Steak, Egg, Fried Rice, Ramen, Oatmeal, Soup with Power Adjustment |

|
| 2 | AMZCHEF Portable Induction Cooktop 20 Temperature & Power Levels, 1800W Induction Stove Burner with 6.8" Heating Coil, Low Noise Hot Plate Single Electric Cooktops Countertop Stove with Timer |
|
| 3 | Instant Pot Duo 7-in-1 Mini Electric Pressure Cooker, Slow Rice Cooker, Steamer, Sauté, Yogurt Maker, Warmer & Sterilizer, Includes Free App with over 1900 Recipes, Stainless Steel, 3 Quart |
|
| 4 | Dezin Hot Pot Electric with Steamer Upgraded, Non-Stick Sauté Pan, Rapid Noodles Electric Pot, 1.5L Mini Pot for Steak, Egg, Fried Rice, Ramen, Oatmeal, Soup with Power Adjustment |
|
| 5 | Dezin Hot Pot Electric Upgraded, Non-Stick Sauté Pan, Rapid Noodles Electric Pot, 1.5L Mini Portable Hot Pot for Steak, Egg, Fried Rice, Ramen, Oatmeal, Soup with Power Adjustment |
|
| 6 | Dezin Hot Pot Electric with Steamer Upgraded, Non-Stick Sauté Pan, Rapid Noodles Electric Pot, 1.5L Mini Pot for Steak, Egg, Fried Rice, Ramen, Oatmeal, Soup with Power Adjustment |
|
| 7 | Dezin Hot Pot Electric with Steamer Upgraded, Non-Stick Sauté Pan, Rapid Noodles Electric Pot, 1.5L Mini Pot for Steak, Egg, Fried Rice, Ramen, Oatmeal, Soup with Power Adjustment |
|
| 8 | Elite Gourmet EG808 8” x 8" Non-stick Electric Skillet, Dishwasher Safe with Tempered Glass Vented Lid, Rapid Heat Up, 600W, Black |
|
| 9 | Green 1L Mini Slow Cooker with Steamer Basket, 200W Smart Ceramic Electric Stew Pot, 24-Hour Timer & Auto Keep-Warm, Dry-Burn Protection, Kitchen Cooking Appliance |
|
| 10 | Pink 1L Ceramic Slow Cooker with Steamer Basket, 200W Mini Electric Stew Pot, 24-Hour Delayed Start & Auto Keep-Warm, Household Kitchen Safety Dry-Burn Protection Porridge & Soup Pot |
|
While butter adds great flavor, it has a low smoke point and can burn easily at the high temperatures required for searing. It’s best to use a high smoke point oil like avocado or canola oil for the initial sear, and then add butter during the final minutes for basting.
How do I prevent excessive smoke when cooking steak in an electric skillet?
Ensure your kitchen is well-ventilated, perhaps by opening a window or turning on your range hood. Using a high smoke point oil helps, as does thoroughly patting your steak dry to reduce moisture that can cause spitting.
What if my steak isn’t browning?
If your steak isn’t developing a good crust, it’s likely due to one of three reasons: the skillet isn’t hot enough, the steak isn’t dry enough, or you’re overcrowding the pan. Ensure adequate preheating, thoroughly pat the steak dry, and cook in batches if needed.
Can I cook a thicker steak (over 1.5 inches) in an electric skillet?
Yes, but it might require a slightly adjusted technique. You can sear it on both sides at high heat, then reduce the temperature, cover the skillet, and cook for a longer period, potentially flipping a few times, until it reaches your desired internal temperature. A meat thermometer is especially crucial for thicker cuts.
How long does it typically take to cook a medium-rare steak in an electric skillet?
For a 1 to 1.5-inch thick steak, you can generally expect a total cooking time of about 6-10 minutes, including searing on both sides and finishing at a lower temperature, before the essential resting period. Always rely on a meat thermometer for accuracy.