Waking up to the aroma of freshly made pancakes is a truly delightful experience, but achieving that perfect stack can sometimes feel like a kitchen challenge. If you own a large electric skillet, you’re already halfway to breakfast perfection. This versatile appliance is an unsung hero for pancake enthusiasts, offering consistent heat and ample space to cook multiple golden-brown beauties at once. Forget unevenly cooked pancakes or juggling multiple pans; mastering your electric skillet means effortless, delicious results every time. This guide will walk you through everything you need to know, from preparing your batter to perfecting your flip, ensuring your mornings start with a delicious stack of fluffy pancakes.
Mastering Pancakes in Your Electric Skillet
An electric skillet can transform your pancake-making game. Unlike traditional stovetop pans, these appliances maintain a remarkably consistent temperature across their entire surface, eliminating hot spots and ensuring every pancake cooks evenly. This precision heat control is paramount for achieving that coveted golden-brown exterior and fluffy interior. The generous surface area of a large electric skillet also allows you to cook a significant batch of pancakes simultaneously, making it ideal for feeding a family or hosting a brunch without endless waiting. It streamlines the process, turning a potentially chaotic morning into a smooth, enjoyable cooking experience.
Beyond the skillet itself, a few essential tools will elevate your pancake production. You’ll need a large mixing bowl for your batter, a whisk to combine ingredients, and a ladle or measuring cup (typically 1/4 or 1/3 cup) for portioning the batter onto the skillet. A thin, wide spatula is crucial for easy flipping without damaging your precious pancakes. For ingredients, ensure you have your chosen pancake mix or individual dry ingredients like flour, baking powder, sugar, and salt, alongside wet components such as milk, eggs, and a touch of oil or melted butter. Having everything prepped and within reach will make the process seamless.
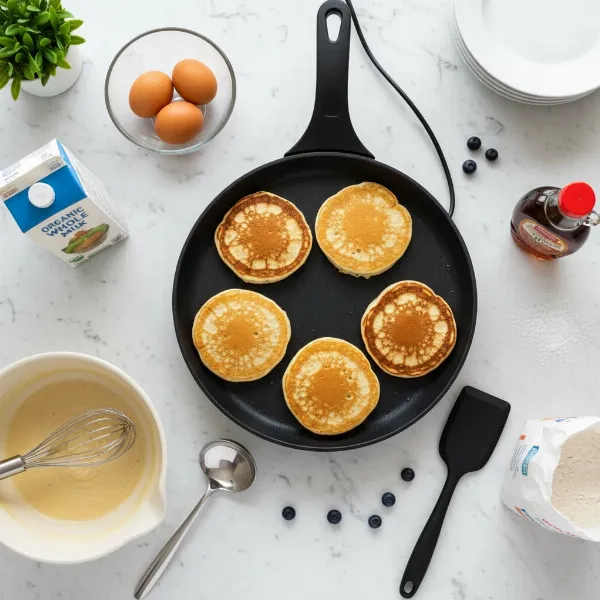 Essential tools and ingredients for making pancakes on an electric skillet.
Perfecting Your Pancake Batter
The foundation of any great pancake is the batter, and getting it right is simpler than you might think. For a classic, fluffy pancake, a common ratio often involves roughly one part flour to one part milk, with appropriate leavening agents like baking powder. However, specific recipes vary, so always follow your preferred recipe closely. Ensure your dry ingredients (flour, sugar, baking powder, salt) are well combined in one bowl and your wet ingredients (milk, eggs, melted butter or oil, vanilla extract if using) in another. This separation helps prevent overmixing later.
When it’s time to combine, the secret to light, airy pancakes lies in your mixing technique. Gently pour the wet ingredients into the dry ingredients. Mix just until the ingredients are moistened. It’s perfectly normal, and even desirable, to have a few small lumps in your batter. Overmixing develops the gluten in the flour, leading to tough, chewy pancakes rather than the fluffy texture you’re aiming for. A light touch with a whisk or fork is all you need to bring the batter together.
Once your batter is mixed, resist the urge to start cooking immediately. Allowing the batter to rest for at least 5 to 10 minutes (or even longer, up to 30 minutes) is a game-changer. This resting period allows the gluten to relax, the flour to fully hydrate, and the leavening agents to begin their work, resulting in a lighter, more tender pancake. You’ll notice the batter might thicken slightly during this time, which is a good sign.
Prepping Your Electric Skillet for Success
Setting your electric skillet to the optimal temperature is perhaps the most critical step for perfect pancakes. Most experts recommend a temperature range of 350°F to 375°F (approximately 175°C to 190°C). If your skillet has a numeric dial, start at 350°F. If it has settings like “medium,” select that. Allow your skillet ample time to preheat thoroughly, typically 5 to 10 minutes. A well-preheated skillet ensures even heat distribution and prevents the first batch from sticking or cooking unevenly.
While many modern electric skillets boast non-stick surfaces, a light application of cooking spray, butter, or oil can further enhance browning and prevent sticking. If using butter, apply it sparingly and wipe away any excess with a paper towel; too much butter can lead to uneven browning and greasy pancakes. For a consistently non-stick surface, you might only need to grease it before the very first batch.
It’s a common culinary adage that the first pancake never turns out as good as the rest. This “first pancake” phenomenon is often due to the skillet not being fully stabilized at its cooking temperature or a slight inconsistency in greasing. Don’t be discouraged! View the first pancake as your test run. It helps you gauge the skillet’s true temperature, the batter’s consistency, and the ideal cooking time. Adjust your temperature slightly if needed, and the subsequent pancakes will reap the benefits of a perfectly calibrated cooking surface.
Cooking Fluffy Pancakes, Batch After Batch
With your batter rested and skillet perfectly preheated, it’s time to start cooking. Using a 1/4 or 1/3 cup ladle or measuring cup, pour portions of batter onto the hot skillet. The exact amount depends on your desired pancake size. Crucially, leave sufficient space between each pancake, typically 1.5 to 2 inches. This not only allows room for easy flipping but also ensures even heat circulation around each pancake, preventing them from steaming rather than browning. A large electric skillet makes this spacing much easier to achieve for multiple pancakes.
Knowing when to flip is key to perfectly cooked pancakes. Resist the urge to flip too early. Wait until you see bubbles forming on the surface of the pancake and the edges begin to look set and dry. These bubbles indicate that the leavening agents are working and the bottom is sufficiently cooked and browned. Typically, this takes about 2 to 3 minutes for the first side. Once these signs appear, gently slide your spatula underneath and flip the pancake in one swift motion.
After flipping, the second side will cook much faster, usually within 1 to 2 minutes, or until it reaches a beautiful golden-brown color. Continue to monitor your skillet’s temperature throughout the cooking process. If your pancakes are browning too quickly, slightly reduce the heat. If they’re taking too long or not browning enough, increase it incrementally. The consistent heat of an electric skillet makes this much easier to manage compared to a stovetop.
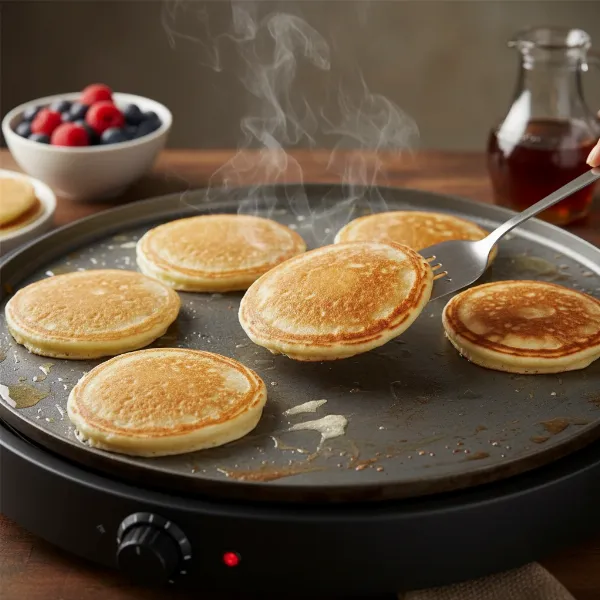 Golden-brown pancakes cooking on an electric skillet, one being flipped with a spatula.
Keeping Your Pancakes Warm
Serving a stack of warm, fresh pancakes is a highlight of any breakfast. As you cook multiple batches, you’ll want a strategy to keep the earlier ones warm. A simple and effective method is to preheat your oven to its lowest setting (around 170-200°F or 75-90°C). Place a baking sheet or oven-safe plate inside. As each batch of pancakes finishes cooking, transfer them to the warm tray in the oven. This keeps them toasty without overcooking them, allowing everyone to enjoy hot pancakes at the same time. You can stack them loosely, covered with foil, to retain moisture.
Troubleshooting Common Pancake Problems
Even with an electric skillet, you might occasionally encounter challenges. If your pancakes are sticking to the skillet, it usually points to insufficient preheating or inadequate greasing. Ensure your skillet is fully preheated to the recommended temperature before pouring batter, and consider a light application of cooking spray or butter if your non-stick coating isn’t performing optimally.
Uneven browning can be frustrating. While electric skillets are known for even heat, variations can still occur. Make sure your skillet is placed on a flat, stable surface and that you’ve given it enough time to fully preheat and stabilize its temperature. If one area consistently browns faster, you might slightly rotate your skillet or adjust where you place your pancakes for the next batch.
Pancakes that are too flat or too dense often stem from overmixing the batter or using old, inactive baking powder. Remember to mix just until combined, leaving small lumps. Always check the expiration date on your baking powder; a fresh leavening agent is crucial for achieving that desirable rise. Another reason can be not letting the batter rest.
Electric Skillet Care and Maintenance
Proper care of your electric skillet will ensure it remains your trusty pancake companion for years to come. After each use, allow the skillet to cool completely before cleaning. Most electric skillets have removable temperature controls, making them fully submersible for easy washing. Hand-wash the skillet with warm, soapy water and a soft sponge. Avoid abrasive scrubbers or harsh detergents, which can damage the non-stick coating. Rinse thoroughly and dry completely before storing to prevent water spots or corrosion.
For the temperature control probe, simply wipe it clean with a damp cloth; never immerse it in water. Regular cleaning and careful handling will preserve your skillet’s non-stick properties and heating efficiency, ensuring perfect pancakes for countless breakfasts to come.
Conclusion
Making delicious, fluffy pancakes in a large electric skillet is a culinary art that is easily mastered with a few key techniques. From ensuring your skillet is perfectly preheated to mastering the art of the flip, each step contributes to a breakfast masterpiece. The consistent heat and generous cooking surface of an electric skillet make it an ideal tool for achieving uniformly golden and airy pancakes, transforming your morning routine into a joyful culinary endeavor. With these tips, you’re well-equipped to turn out perfect pancakes every time, delighting family and friends alike. What kind of creative toppings will you add to your next electric skillet pancake masterpiece?
Frequently Asked Questions
What is the ideal temperature for cooking pancakes in an electric skillet?
|
Our Picks for the Best Electric cooker in 2026
As an Amazon Associate I earn from qualifying purchases.
|
||
| Num | Product | Action |
|---|---|---|
| 1 | Dezin Hot Pot Electric with Steamer Upgraded, Non-Stick Sauté Pan, Rapid Noodles Electric Pot, 1.5L Mini Pot for Steak, Egg, Fried Rice, Ramen, Oatmeal, Soup with Power Adjustment |

|
| 2 | Dezin Hot Pot Electric with Steamer Upgraded, Non-Stick Sauté Pan, Rapid Noodles Electric Pot, 1.5L Mini Pot for Steak, Egg, Fried Rice, Ramen, Oatmeal, Soup with Power Adjustment |
|
| 3 | Dezin Hot Pot Electric with Steamer Upgraded, Non-Stick Sauté Pan, Rapid Noodles Electric Pot, 1.5L Mini Pot for Steak, Egg, Fried Rice, Ramen, Oatmeal, Soup with Power Adjustment |
|
| 4 | AMZCHEF Portable Induction Cooktop 20 Temperature & Power Levels, 1800W Induction Stove Burner with 6.8" Heating Coil, Low Noise Hot Plate Single Electric Cooktops Countertop Stove with Timer |
|
| 5 | Dezin Hot Pot Electric with Steamer Upgraded, Non-Stick Sauté Pan, Rapid Noodles Electric Pot, 1.5L Mini Pot for Steak, Egg, Fried Rice, Ramen, Oatmeal, Soup with Power Adjustment |
|
| 6 | Instant Pot Duo 7-in-1 Mini Electric Pressure Cooker, Slow Rice Cooker, Steamer, Sauté, Yogurt Maker, Warmer & Sterilizer, Includes Free App with over 1900 Recipes, Stainless Steel, 3 Quart |
|
| 7 | Elite Gourmet EG808 8” x 8" Non-stick Electric Skillet, Dishwasher Safe with Tempered Glass Vented Lid, Rapid Heat Up, 600W, Black |
|
| 8 | Dezin Hot Pot Electric Upgraded, Non-Stick Sauté Pan, Rapid Noodles Electric Pot, 1.5L Mini Portable Hot Pot for Steak, Egg, Fried Rice, Ramen, Oatmeal, Soup with Power Adjustment |
|
| 9 | Pink 1L Ceramic Slow Cooker with Steamer Basket, 200W Mini Electric Stew Pot, 24-Hour Delayed Start & Auto Keep-Warm, Household Kitchen Safety Dry-Burn Protection Porridge & Soup Pot |
|
| 10 | Green 1L Mini Slow Cooker with Steamer Basket, 200W Smart Ceramic Electric Stew Pot, 24-Hour Timer & Auto Keep-Warm, Dry-Burn Protection, Kitchen Cooking Appliance |
|
The optimal temperature for cooking pancakes in an electric skillet is generally between 350°F and 375°F (175°C to 190°C). This range ensures even cooking and a golden-brown finish without burning the exterior or leaving the interior raw.
How do I know when to flip a pancake on an electric skillet?
You should flip a pancake when you see bubbles forming across the surface and the edges appear set and slightly dry. These indicators signal that the bottom is cooked through and ready to be turned for the second side.
Why are my pancakes sticking to the electric skillet?
Pancakes often stick if the electric skillet is not sufficiently preheated or if it wasn’t adequately greased. Ensure the skillet reaches its full temperature before adding batter, and consider a light application of cooking spray or butter, even on non-stick surfaces.
Can I make a large batch of pancakes simultaneously in an electric skillet?
Absolutely! One of the primary advantages of a large electric skillet is its ample surface area, allowing you to cook multiple pancakes at once. Just remember to leave enough space between each pancake for even cooking and easy flipping.
How do I keep pancakes warm while cooking subsequent batches?
To keep pancakes warm, preheat your oven to its lowest setting (around 170-200°F or 75-90°C) and place a baking sheet inside. Transfer cooked pancakes to the warm tray in the oven, optionally covering them lightly with foil, until ready to serve.