Moving to a new home can be an exciting yet daunting task, especially when it comes to safeguarding your valuable kitchen appliances. Among them, your electric cooker, a staple in many households, requires careful attention to ensure it arrives at your new destination in perfect working order. A small bump or improper packing can lead to frustrating damage or malfunction. This guide will walk you through every essential step, from preparation to unpacking, helping you move your electric cooker with confidence and ease.
Preparation is Key: Before You Pack
Before you even reach for the packing tape, a little preparation goes a long way in ensuring your electric cooker’s safe journey. Taking these initial steps will protect your appliance and make the packing process smoother.
Cleaning Your Electric Cooker Thoroughly
|
Our Picks for the Best Electric cooker in 2026
As an Amazon Associate I earn from qualifying purchases.
|
||
| Num | Product | Action |
|---|---|---|
| 1 | AMZCHEF Portable Induction Cooktop 20 Temperature & Power Levels, 1800W Induction Stove Burner with 6.8" Heating Coil, Low Noise Hot Plate Single Electric Cooktops Countertop Stove with Timer |

|
| 2 | Instant Pot Duo 7-in-1 Mini Electric Pressure Cooker, Slow Rice Cooker, Steamer, Sauté, Yogurt Maker, Warmer & Sterilizer, Includes Free App with over 1900 Recipes, Stainless Steel, 3 Quart |
|
| 3 | Elite Gourmet EG808 8” x 8" Non-stick Electric Skillet, Dishwasher Safe with Tempered Glass Vented Lid, Rapid Heat Up, 600W, Black |
|
| 4 | Dezin Hot Pot Electric Upgraded, Non-Stick Sauté Pan, Rapid Noodles Electric Pot, 1.5L Mini Portable Hot Pot for Steak, Egg, Fried Rice, Ramen, Oatmeal, Soup with Power Adjustment |
|
| 5 | Dezin Hot Pot Electric with Steamer Upgraded, Non-Stick Sauté Pan, Rapid Noodles Electric Pot, 1.5L Mini Pot for Steak, Egg, Fried Rice, Ramen, Oatmeal, Soup with Power Adjustment |
|
| 6 | Green 1L Mini Slow Cooker with Steamer Basket, 200W Smart Ceramic Electric Stew Pot, 24-Hour Timer & Auto Keep-Warm, Dry-Burn Protection, Kitchen Cooking Appliance |
|
| 7 | Dezin Hot Pot Electric with Steamer Upgraded, Non-Stick Sauté Pan, Rapid Noodles Electric Pot, 1.5L Mini Pot for Steak, Egg, Fried Rice, Ramen, Oatmeal, Soup with Power Adjustment |
|
| 8 | Pink 1L Ceramic Slow Cooker with Steamer Basket, 200W Mini Electric Stew Pot, 24-Hour Delayed Start & Auto Keep-Warm, Household Kitchen Safety Dry-Burn Protection Porridge & Soup Pot |
|
| 9 | Dezin Hot Pot Electric with Steamer Upgraded, Non-Stick Sauté Pan, Rapid Noodles Electric Pot, 1.5L Mini Pot for Steak, Egg, Fried Rice, Ramen, Oatmeal, Soup with Power Adjustment |
|
| 10 | Dezin Hot Pot Electric with Steamer Upgraded, Non-Stick Sauté Pan, Rapid Noodles Electric Pot, 1.5L Mini Pot for Steak, Egg, Fried Rice, Ramen, Oatmeal, Soup with Power Adjustment |
|
Begin by giving your electric cooker a comprehensive clean. Any leftover food particles or grease can attract pests, create unpleasant odors, or even stain other items during transit. Remove the inner pot, lid, and any other detachable components, washing them thoroughly with soap and water. Ensure all parts are completely dry before reassembling or packing to prevent mold or mildew growth. Wipe down the exterior of the main unit with a damp cloth, paying attention to the control panel and crevices.
Gathering Your Essential Packing Supplies
Having the right materials on hand will make packing efficient and effective. You will need:
- Sturdy Moving Boxes: Ideally, use the original box your electric cooker came in, if available. Otherwise, opt for a strong cardboard box that is slightly larger than your appliance.
- Bubble Wrap: For cushioning delicate surfaces and absorbing shocks.
- Packing Paper or Newspaper: To fill gaps and provide additional padding.
- Packing Tape: Strong, reliable tape to secure boxes and wrapping.
- Scissors or a Box Cutter: For cutting tape and packing materials.
- Markers: To clearly label your boxes.
- Moving Blankets or Old Towels: For extra protection, especially if not using a box.
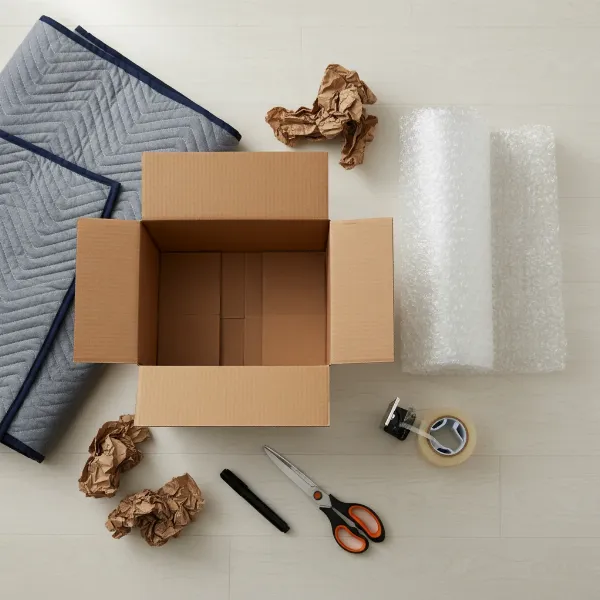 Essential packing supplies like bubble wrap, boxes, tape, and markers for moving an electric cooker.
Disconnecting and Securing Power Cords
Safety starts with proper disconnection. Unplug your electric cooker from the power outlet. Once unplugged, neatly coil the power cord. You can secure it to the back or side of the appliance with a piece of packing tape or a twist tie. Avoid taping directly onto painted or delicate surfaces, as adhesive residue can cause damage. For models with detachable cords, store the cord separately with the cooker’s accessories in a small, labeled bag.
Step-by-Step Packing Guide for Your Electric Cooker
With preparations complete, it’s time to carefully pack your electric cooker. Follow these steps to maximize protection for every part of your appliance.
Removing and Protecting Detachable Parts
Most electric cookers come with several removable components that need individual attention.
- Inner Pot: Carefully remove the inner cooking pot. If it has a non-stick coating, wrap it individually in bubble wrap or packing paper to prevent scratches. Place it inside a small plastic bag or wrap it again to ensure no debris gets inside.
- Lid: Whether glass or solid, the lid is often fragile. Wrap it securely in multiple layers of bubble wrap, paying extra attention to any handles or steam vents.
- Accessories: Small items like measuring cups, serving spoons, steaming trays, or recipe books should be gathered together. Place them in a small, sealable bag and cushion them with packing paper.
Consider placing all these detachable parts, once individually wrapped, back inside the main unit’s cavity (if space allows and they are well-cushioned) or in a separate, clearly labeled “Accessories” box that will be moved with the main cooker.
Wrapping the Main Unit
The main body of your electric cooker, containing the heating element and control panel, needs robust protection.
- Control Panel: If your cooker has a digital display or protruding buttons, add an extra layer of bubble wrap or cardboard over this area first.
- Overall Wrapping: Wrap the entire electric cooker unit in several layers of bubble wrap. Ensure all sides, corners, and the top are thoroughly covered. Secure the bubble wrap with packing tape, making sure it’s snug but not overly tight. If you have moving blankets, a final layer around the bubble-wrapped appliance offers additional shock absorption.
Choosing the Right Box
Selecting the correct box is crucial for stability and protection.
- Original Box: If you still have the original manufacturer’s box with its custom-fitted foam inserts, use it! This is designed to provide the best possible protection.
- New Box: If not, find a sturdy double-walled cardboard box that is just slightly larger than your wrapped electric cooker. Too big a box will allow the appliance to shift excessively, while too small a box won’t provide adequate cushioning.
Cushioning and Filling Gaps
Once the electric cooker is wrapped, carefully place it into the chosen box.
- Bottom Padding: Line the bottom of the box with a generous layer of crumpled packing paper, balled-up newspaper, or foam peanuts. This creates a shock-absorbing base.
- Positioning: Gently place the wrapped electric cooker into the center of the box, ensuring it sits flat and stable.
- Filling Voids: Fill any remaining empty spaces around the appliance with more crumpled packing paper, foam peanuts, or even soft towels. The goal is to prevent any movement inside the box during transit. Shake the box gently; if you feel or hear movement, add more cushioning.
Sealing and Labeling Your Box
Proper sealing and clear labeling are the final steps before your electric cooker is ready to move.
- Sealing: Securely close the box flaps and seal all seams and edges with strong packing tape. Apply tape liberally to reinforce the box, especially the bottom.
- Labeling: Use a thick marker to clearly label the box on at least two sides. Write “Electric Cooker,” “Fragile,” and “This Side Up” to alert movers to its delicate contents and proper orientation. You might also want to label the destination room, such as “Kitchen.”
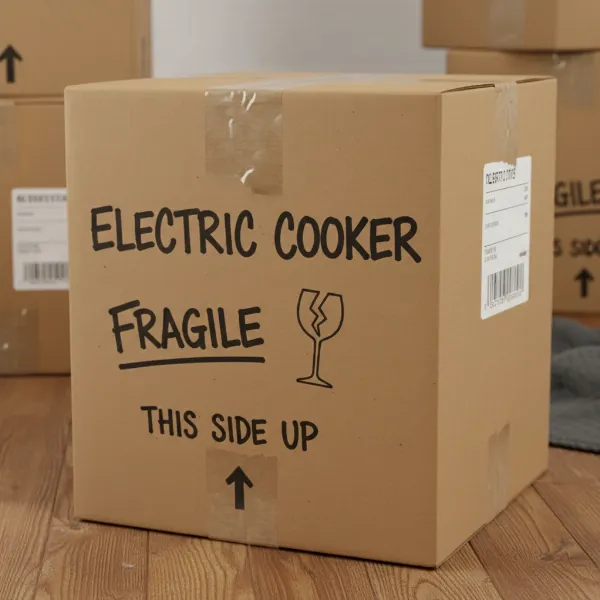 A securely sealed and clearly labeled cardboard box for an electric cooker, marked "Fragile" and "This Side Up."
Loading and Transporting Your Electric Cooker
How you handle your packed electric cooker during the move is just as important as how you packed it. Follow these guidelines for safe transport.
Keeping it Upright
Always transport your electric cooker in an upright position. Laying it on its side, especially for extended periods, could potentially damage internal components or even cause oil from certain models to leak.
Avoiding Stacking
Never stack heavy boxes or other items directly on top of your electric cooker’s box. Despite robust packing, excessive weight can crush the box or damage the appliance within. If absolutely necessary to stack, place lighter, less fragile items on top, ensuring the weight is distributed evenly across the box edges rather than directly on the cooker.
Securing in the Moving Vehicle
Once in the moving truck or your personal vehicle, ensure the electric cooker’s box is secured. Place it in a stable location, preferably wedged between other sturdy items or against a wall of the vehicle. Use bungee cords, moving straps, or ropes to tie it down if there’s any risk of it shifting or tipping over during turns or stops.
Unpacking and Setup at Your New Home
The journey isn’t over until your electric cooker is safely settled in its new home.
Careful Unpacking
Upon arrival, carefully open the box. Remove the cushioning materials first, then gently lift out the wrapped electric cooker. Unpeel the bubble wrap and packing paper, keeping track of all the small components you packed separately.
Inspecting for Damage
Before plugging in your appliance, take a moment to inspect it thoroughly. Check the exterior for any dents, scratches, or cracks. Examine the power cord for fraying or damage. Ensure the inner pot and lid are intact and free from deformities. If you notice any significant damage, document it immediately.
First Use Considerations
Once you’ve cleaned and inspected your electric cooker, reassemble all its parts. Allow it to sit unplugged for a short period (perhaps an hour) after a long move, especially if it experienced significant temperature changes, to allow it to acclimate to the new environment. Then, plug it in and test it with a simple function, like boiling water, to ensure everything is working correctly before cooking a full meal.
Expert Tips for a Smooth Move
Moving appliances can be simplified with a few seasoned tips.
Consider Original Packaging
If you still have the original box and inserts for your electric cooker, always prioritize using them. They are custom-designed to provide the best fit and protection, significantly reducing the risk of damage during transit.
Take Photos
Before and after packing, snap a few photos of your electric cooker. These can serve as proof of its condition before the move, which can be invaluable for insurance claims if any damage occurs. Also, photos can help you remember how to reassemble components.
Professional Movers
For those who prefer a completely hands-off approach, consider hiring professional movers specializing in appliance transport. They have the experience, tools, and insurance to handle your electric cooker and other delicate items with the utmost care. This investment can save you time, stress, and potential repair costs.
Conclusion
Packing your electric cooker for a move might seem like a minor detail amidst the chaos of relocation, but proper care ensures your trusty kitchen companion is ready to cook your favorite meals in your new home. By meticulously cleaning, carefully wrapping, securely boxing, and safely transporting your appliance, you can avoid common moving mishaps. Remember, a little extra effort now can save you significant trouble and expense later, making your move smoother and your transition into a new kitchen seamless. What culinary adventure will your electric cooker embark on first in its new surroundings?
Frequently Asked Questions
Can I pack my electric cooker with other kitchen items in the same box?
While it’s generally best to pack your electric cooker in its own sturdy box for maximum protection, if space is limited, you can pack it with other small, non-fragile kitchen items, provided there is ample cushioning between everything, and the box isn’t overloaded or too large.
What if I don’t have the original box for my electric cooker?
No worries! Select a sturdy, double-walled cardboard box that is only slightly larger than your electric cooker. Pad the bottom and all sides with crumpled packing paper, bubble wrap, or foam peanuts to prevent shifting and absorb shocks during transit.
How do I protect the non-stick inner pot of my electric cooker?
The non-stick inner pot is prone to scratches. Always remove it from the main unit and wrap it individually in several layers of bubble wrap or soft packing paper. You can also place it inside a clean plastic bag for an extra layer of protection before cushioning it further.
Should I clean my electric cooker before moving?
Absolutely. Cleaning your electric cooker thoroughly before packing prevents any leftover food residues from spoiling, attracting pests, or creating unpleasant odors in your moving boxes or at your new home. Ensure all parts are completely dry to avoid mold or mildew.