Are you tired of cold, unappetizing lunches at work, on the road, or simply when you’re away from home? The electric lunch box has revolutionized the way we enjoy warm, homemade meals, offering a convenient solution for anyone who needs a hot meal on the go. This guide will walk you through everything you need to know about effectively reheating your delicious leftovers in an electric lunch box, ensuring every bite is as satisfying as the first.
Understanding Your Electric Lunch Box
Electric lunch boxes are portable food heaters designed to warm your meals without the need for a microwave or stovetop. They typically consist of a heating element, a removable food-grade container (often stainless steel), and a power cord.
How They Work
Most electric lunch boxes operate by directly heating the food container using a low-power heating element. Some models use a water-based heating system, where a small amount of water is added to a base compartment to generate steam, which then heats the food indirectly and helps retain moisture.
Types of Electric Lunch Boxes
- AC Powered: These are designed to plug into standard wall outlets (110V/220V), ideal for offices, schools, or homes.
- DC Powered (Car/Truck): Equipped with a car adapter (12V/24V), these are perfect for commuters, truck drivers, or travelers.
- Dual-Purpose: Many modern lunch boxes come with both AC and DC cords for maximum versatility.
- Smart Lunch Boxes: Advanced models may include features like app control for temperature settings and scheduled heating, ensuring your meal is ready exactly when you want it.
Key Features to Look For
- Removable Stainless Steel Tray: Essential for easy cleaning and durability.
- Steam Vent: Allows steam to escape during heating, preventing pressure buildup and keeping food from getting soggy.
- Indicator Light: Shows when the device is powered on and heating.
- Leak-Proof Design: Crucial for transporting soups and stews without spills.
- Compartments: Some models offer multiple compartments to keep different food items separate.
|
Our Picks for the Best Electric cooker in 2026
As an Amazon Associate I earn from qualifying purchases.
|
||
| Num | Product | Action |
|---|---|---|
| 1 | Green 1L Mini Slow Cooker with Steamer Basket, 200W Smart Ceramic Electric Stew Pot, 24-Hour Timer & Auto Keep-Warm, Dry-Burn Protection, Kitchen Cooking Appliance |

|
| 2 | Dezin Hot Pot Electric with Steamer Upgraded, Non-Stick Sauté Pan, Rapid Noodles Electric Pot, 1.5L Mini Pot for Steak, Egg, Fried Rice, Ramen, Oatmeal, Soup with Power Adjustment |
|
| 3 | Dezin Hot Pot Electric Upgraded, Non-Stick Sauté Pan, Rapid Noodles Electric Pot, 1.5L Mini Portable Hot Pot for Steak, Egg, Fried Rice, Ramen, Oatmeal, Soup with Power Adjustment |
|
| 4 | AMZCHEF Portable Induction Cooktop 20 Temperature & Power Levels, 1800W Induction Stove Burner with 6.8" Heating Coil, Low Noise Hot Plate Single Electric Cooktops Countertop Stove with Timer |
|
| 5 | Dezin Hot Pot Electric with Steamer Upgraded, Non-Stick Sauté Pan, Rapid Noodles Electric Pot, 1.5L Mini Pot for Steak, Egg, Fried Rice, Ramen, Oatmeal, Soup with Power Adjustment |
|
| 6 | Pink 1L Ceramic Slow Cooker with Steamer Basket, 200W Mini Electric Stew Pot, 24-Hour Delayed Start & Auto Keep-Warm, Household Kitchen Safety Dry-Burn Protection Porridge & Soup Pot |
|
| 7 | Dezin Hot Pot Electric with Steamer Upgraded, Non-Stick Sauté Pan, Rapid Noodles Electric Pot, 1.5L Mini Pot for Steak, Egg, Fried Rice, Ramen, Oatmeal, Soup with Power Adjustment |
|
| 8 | Instant Pot Duo 7-in-1 Mini Electric Pressure Cooker, Slow Rice Cooker, Steamer, Sauté, Yogurt Maker, Warmer & Sterilizer, Includes Free App with over 1900 Recipes, Stainless Steel, 3 Quart |
|
| 9 | Dezin Hot Pot Electric with Steamer Upgraded, Non-Stick Sauté Pan, Rapid Noodles Electric Pot, 1.5L Mini Pot for Steak, Egg, Fried Rice, Ramen, Oatmeal, Soup with Power Adjustment |
|
| 10 | Elite Gourmet EG808 8” x 8" Non-stick Electric Skillet, Dishwasher Safe with Tempered Glass Vented Lid, Rapid Heat Up, 600W, Black |
|
 Modern electric lunch box with stainless steel tray, steam vent, and power cord.
Step-by-Step Guide to Reheating Leftovers
Mastering your electric lunch box is simple. Follow these steps for a perfectly warmed meal every time.
- Prepare Your Food: Before packing, ensure your leftovers are cooked through and safely stored. Cut larger food items into smaller, uniform pieces for more even heating. For dishes that might dry out, such as rice or pasta, add a tablespoon or two of water or broth to maintain moisture.
- Load the Lunch Box: Place your food into the removable stainless steel container. Avoid overfilling, as this can hinder efficient heating and potentially cause spills.
- Secure the Lid and Open the Vent: Ensure the main lid is securely fastened. Crucially, always open the steam vent during heating. This allows steam to escape, preventing pressure buildup and ensuring your food heats evenly without becoming mushy. If your lunch box has a rubber bung over the vent, remove it or open the designated vent cover.
- Connect to Power:
- For AC models: Plug the power cord into a standard wall outlet.
- For DC models: Plug the car adapter into your vehicle’s 12V or 24V socket.
- The indicator light should illuminate, signaling that heating has begun.
- Allow Sufficient Heating Time: Heating times vary based on the type of food, its initial temperature (refrigerated vs. room temperature), and the wattage of your lunch box.
- From Refrigerated (AC outlet): Expect 20-30 minutes.
- From Room Temperature (AC outlet): Typically 10-20 minutes.
- Using a Car Charger (DC outlet): Generally takes longer, around 30-50 minutes, due to lower power output.
- Always extend heating time for denser foods or larger portions.
- Check Food Temperature: For food safety, leftovers should reach an internal temperature of at least 165°F (74°C) to kill any potential bacteria. If possible, use a food thermometer to verify. If you don’t have one, ensure the food is steaming hot throughout.
Optimal Foods for Your Electric Lunch Box
Electric lunch boxes excel at reheating certain types of dishes, making them ideal for a variety of meals.
Best Choices:
- Stews and Soups: Their liquid content helps them heat evenly and stay moist. Ensure your lunch box is leak-proof.
- Pasta Dishes: Spaghetti, lasagna, macaroni and cheese all reheat well. Adding a little extra sauce or water can prevent dryness.
- Rice and Grain Bowls: Fried rice, curries with rice, and quinoa salads are excellent.
- Casseroles and Baked Dishes: Shepherd’s pie, chicken pot pie, or vegetable bakes.
- Cooked Meats and Vegetables: Chicken, beef, fish, and most cooked vegetables warm up nicely.
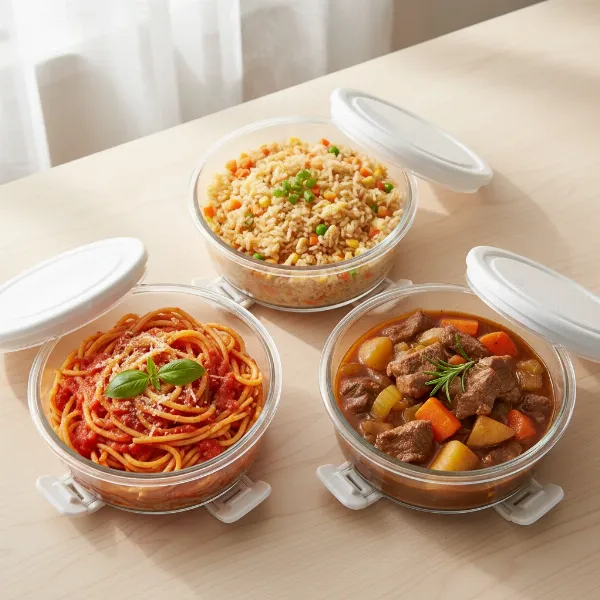 Various optimal dishes like pasta, rice, and stew ready for reheating in an electric lunch box.
Foods to Be Cautious With:
- Fried Foods: May lose their crispiness and become soggy.
- Delicate Items: Salads, fresh herbs, or very thinly sliced meats might overcook or wilt easily.
- Raw Foods: Electric lunch boxes are not designed for cooking raw ingredients, only reheating.
Safety and Best Practices
To ensure your electric lunch box serves you safely and effectively for years to come, follow these guidelines.
- Food Safety First: Always store cooked leftovers promptly in the refrigerator within two hours. When reheating, ensure food reaches 165°F (74°C) to eliminate harmful bacteria. Do not repeatedly reheat food.
- Avoid Overfilling: Filling the container too high can lead to spills and inefficient heating. Leave some space for steam circulation.
- Proper Sealing: Always ensure the lid is securely latched to prevent leaks and retain heat.
- Ventilation is Key: Never forget to open the steam vent. Failure to do so can create pressure, potentially damaging the lunch box or causing an unsafe release of steam.
- Cleanliness Matters:
- Always unplug the device before cleaning.
- Remove the stainless steel inner tray and wash it thoroughly with soap and water after each use.
- Wipe the exterior and heating base with a damp cloth.
- Never submerge the main heating unit or electrical components in water. This can cause severe damage and pose an electrical hazard.
- Mind the Cords: Use only the power cords provided with your electric lunch box. Inspect cords regularly for any signs of wear or damage.
Troubleshooting Common Issues
Even with careful use, you might encounter minor issues. Here are quick solutions to common problems.
- Food Not Hot Enough:
- Solution: Extend heating time. Ensure the steam vent was open, and the lid was securely closed to trap heat. Check if the lunch box is properly plugged in and the indicator light is on.
- Uneven Heating:
- Solution: Stir the food midway through the heating cycle if possible, or arrange food in a single, even layer. Cut food into smaller, uniform pieces.
- Food Drying Out:
- Solution: Add a small amount of water, broth, or sauce to the food before heating. Ensure the lid is properly sealed (after opening the vent) to lock in moisture.
- Leaking:
- Solution: Check the silicone seal around the lid for proper placement and any damage. Do not overfill the container, especially with liquid-heavy foods.
Conclusion
The electric lunch box is an invaluable tool for anyone seeking the comfort and convenience of a warm, home-cooked meal, no matter where they are. By understanding its functions, following simple reheating steps, and adhering to safety protocols, you can unlock a world of delicious, hot leftovers. Say goodbye to cold sandwiches and long microwave lines, and embrace the ease of a perfectly warmed meal, tailored to your schedule and preferences. What will be the first delicious leftover you bring to life in your electric lunch box?
Frequently Asked Questions
How long does an electric lunch box take to heat food?
Heating typically takes 10-20 minutes for food starting at room temperature when plugged into a wall outlet, and 20-30 minutes for refrigerated food. When using a car adapter, expect longer times, usually 30-50 minutes, depending on the food and device wattage.
Can I put cold food directly into an electric lunch box?
Yes, you can put cold, refrigerated food directly into an electric lunch box. However, it will require a longer heating time compared to food that is already at room temperature. Always ensure the food reaches a safe internal temperature of 165°F (74°C).
Is it safe to leave an electric lunch box plugged in for an extended period?
It’s generally recommended to only plug in your electric lunch box for the duration needed to heat your meal. While many models have safety features, unplugging it after use conserves energy and prevents potential overheating, prolonging the device’s lifespan.
What kind of containers can I use inside an electric lunch box?
Most electric lunch boxes come with their own removable stainless steel or food-grade plastic containers. It’s best to use these provided containers as they are designed to fit and withstand the heating process of your specific device. Avoid using external containers that are not intended for the lunch box.
Can an electric lunch box cook raw food?
No, an electric lunch box is designed solely for reheating cooked food, not for cooking raw ingredients. The heating elements typically do not reach temperatures high enough or consistently enough to safely cook raw meats or other uncooked items.
How do I clean my electric lunch box safely?
Always unplug the device first. Remove the inner food containers and wash them with warm, soapy water. Wipe down the exterior and heating base with a damp cloth. Crucially, never immerse the main electrical unit in water to avoid damage and electrical hazards.
Do I need to add water to my electric lunch box?
Some models of electric lunch boxes, particularly those using a steam-heating method, require a small amount of water to be added to a designated compartment in the base unit. Always refer to your specific model’s instruction manual to determine if water addition is necessary for optimal heating.