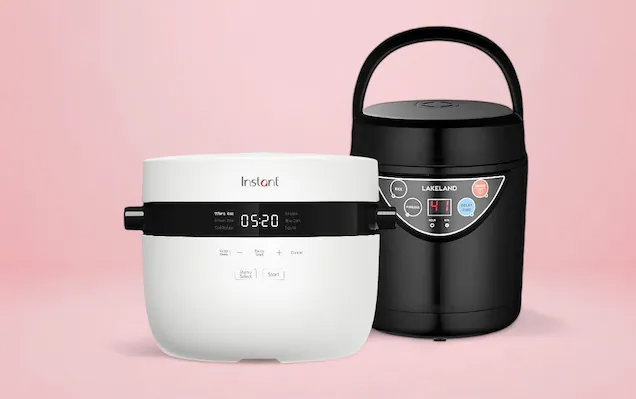
An electric cooker with timer is a game-changer for 2025 kitchens, offering convenience and precision for busy cooks and beginners alike. These versatile appliances, designed for rice, soups, steamed dishes, and more, feature programmable timers that allow you to set cooking schedules, ensuring meals are ready when you are. Models like the Instant Pot Pro Plus or Zojirushi NS-TSC10, celebrated for their timer functions, make cooking with electric cooker effortless, whether in a home kitchen or as a portable electric cooker. This electric cooker user guide helps you master the electric cooker with timer. For more insights, explore our electric cooking tips.
This electric cooker with timer guide covers preparation, a step-by-step cooking process including how to cook rice in an electric cooker, maintenance tips, troubleshooting advice, and answers to common questions. Designed for beginners, this guide ensures you can use your cooker’s timer features with confidence. Always consult your model’s manual for specific instructions. Let’s dive into mastering the electric cooker with timer in 2025!
What You Need Before Using
Before using your electric cooker with timer, proper preparation ensures safe and efficient operation. Your cooker typically includes a main unit, a non-stick or stainless steel inner pot, lid, measuring cup, spatula, and often a steaming tray, as seen in models like the Breville Fast Slow Pro. If accessories are missing, source compatible ones from the manufacturer to ensure electric cooker safety and performance.
Check your cooker’s power compatibility—most models use 120V outlets in the U.S. or 220V elsewhere, so confirm for your region. Verify capacity: 3-quart for individuals (ideal for portable electric cooker models), 6-quart for small families, or 8-quart for larger groups. Choosing the right size prevents spills and optimizes timer functions. For safety, place the cooker on a stable, heat-resistant surface, away from water to avoid electrical hazards. Inspect the power cord for damage; replace if frayed to prevent issues during electric cooker troubleshooting. Use in a well-ventilated area and never leave unattended, especially when programming timers.
Before first use, clean the inner pot, lid, and accessories with warm soapy water, rinse thoroughly, and dry to remove manufacturing residues, a step crucial for the electric cooker with timer. Use the provided measuring cup for accurate portions; a 1:1 rice-to-water ratio works for white rice, with slight increases for brown varieties. Read the manual for model-specific timer settings, as many cookers feature digital displays or app connectivity. Gather ingredients, keep children and pets away from hot surfaces, and use oven mitts. Use a dedicated outlet to avoid circuit overloads. These steps ensure a smooth electric cooker setup. For more guidance, visit our cooker guide.
Step-by-Step Cooking Guide
This electric cooker with timer guide provides a beginner-friendly electric cooker user guide to leverage the precision of timer-enabled cookers. We’ll cover preparing ingredients, electric cooker setup, selecting modes, starting cooking, testing doneness, and electric cooker troubleshooting.
Preparing Ingredients
Proper preparation ensures optimal results with your electric cooker with timer. For how to cook rice in an electric cooker, rinse 1-2 cups of rice under cold water until clear to remove excess starch, ensuring fluffy grains, a tip often highlighted for models like the Zojirushi NS-TSC10. Drain thoroughly. For soups, chop vegetables like onions, carrots, or celery, and measure broth or water (e.g., 4-6 cups for a 6-quart cooker). Season early with salt or herbs for flavor. For steaming, place vegetables, fish, or dumplings in the steaming tray. Prep takes 5-10 minutes, minimizing mess and supporting electric cooker maintenance.
Setting Up the Cooker
Plug your electric cooker into a stable outlet on a flat, heat-resistant surface. Insert the clean inner pot, add ingredients (e.g., rinsed rice and water), and secure the lid until it locks, a feature praised in models like the Instant Pot Pro Plus. Select the cooking mode and set the timer via the digital panel or app (if smart-enabled). Most cookers offer presets like “Rice,” “Steam,” or “Soup.” For portable electric cooker users, ensure stability to avoid spills.
Check the lid seal and steam valve to prevent leaks, which can affect performance. If using a smart model, ensure Wi-Fi or Bluetooth connectivity for remote timer control, a hallmark of the electric cooker with timer.
Selecting Modes
Choose the appropriate mode and set the timer for your dish. For rice, select “Rice” and program the timer (e.g., 5-12 minutes for white rice); advanced models adjust for grain type using fuzzy logic. Use “Steam” mode for vegetables or fish, adding 1-2 cups of water below the tray, with a timer set for 10-15 minutes. “Soup” or “Porridge” modes suit slow-simmered dishes, typically 20-30 minutes. For delayed cooking, use the timer to start later, ideal for busy schedules. These features make cooking with electric cooker convenient, a key benefit of the electric cooker with timer.
Starting Cooking
Press “Start” or use the app—the display confirms the timer and operation. Ensure the steam release valve is set to “Sealing” for pressure cooking modes. Avoid opening the lid mid-cook to maintain heat and pressure. The cooker switches to “Keep Warm” mode automatically after the timer completes, maintaining food temperature without overcooking. Cooking times vary: rice takes 5-12 minutes, soups 20-30 minutes. Monitor via the app for real-time updates if available.
Testing Doneness
After the timer completes and the cooker switches to “Warm,” wait 5-10 minutes for settling (or use quick release for pressure cookers). Open the lid using oven mitts to avoid steam burns. For rice, fluff with a spatula and check for tenderness—grains should be soft but not mushy, a strength of the electric cooker with timer. For soups, taste for seasoning and texture; vegetables should be tender. If undercooked, add water and restart briefly. For steamed items, test with a fork—they should be tender yet crisp. Timer precision ensures consistent results.
Troubleshooting
For electric cooker troubleshooting, address common issues with timer-enabled electric cookers:
1. Not Heating: Check the power supply—test the outlet with another device. Inspect the cord for damage; replace if frayed. Ensure the inner pot contacts the heating element.
2. Timer Not Working: Verify the timer settings in the manual; reset by unplugging for 10 minutes. Check for app updates if smart-enabled.
3. Steam Leaks: Ensure the lid is locked and the sealing ring is intact. Replace worn seals to maintain pressure.
4. Burn Error: Clean residue from the inner pot or heating plate; use more liquid (e.g., 1 cup minimum) to prevent scorching.
5. Error Codes (e.g., E1, C6): Refer to the manual—codes often indicate sensor issues. Unplug for 10 minutes to reset, then retry.
If issues persist, contact the manufacturer’s support. Practice with electric cooker recipes like steamed vegetables or risotto to test fixes, leveraging timer accuracy.
Tips for Successful Cooking
Maximize your electric cooker with timer with these best electric cooker tips. For electric cooker maintenance, clean the cooled inner pot with a soft sponge—avoid abrasives to protect the non-stick or stainless steel surface. Wash the lid, sealing ring, and steaming tray with warm soapy water; air dry to prevent mold. Never immerse the base; wipe with a damp cloth. Soak the pot in a vinegar-water mix (1:4 ratio) for 15-20 minutes to remove stains.
For electric cooker safety, use silicone or wooden utensils to avoid scratches, and store in a dry place. Save energy by using the timer to cook in batches and leveraging “Keep Warm” mode’s residual heat—timer-enabled cookers are energy-efficient. Explore electric cooker recipes like yogurt, oatmeal, or chili, often guided by app-based timers in smart models. Add seasonings post-cook for flavor flexibility. For portable electric cooker use, pack compact models securely and check voltage compatibility when traveling. Avoid overfilling to prevent spills—follow capacity markers. Descale every three months with a vinegar-water mix to maintain performance. For more tips, visit our electric cooker.
Frequently Asked Questions
This electric cooker with timer guide addresses common queries to enhance your electric cooker user guide.
What Happens If Power Goes Out?
If power cuts off, cooking stops, and pressure (if applicable) releases naturally. When power resumes, reset the timer and restart if less than halfway done; otherwise, check doneness manually with a fork or taste test. Discard food if left warm too long to avoid spoilage. Timer-enabled cookers recover well with “Keep Warm” modes.
How to Fix Common Issues?
Beyond electric cooker troubleshooting, fix steam leaks by tightening the lid or replacing the seal. For sticky rice, adjust water ratios (e.g., 1:1 for white rice) and clean thoroughly. Regular maintenance prevents issues, a key benefit of the electric cooker with timer.
Do You Need Professional Help?
Minor fixes like cleaning or seal replacement are DIY-friendly. For persistent issues like timer malfunctions or sensor errors, contact the manufacturer’s support. Many timer-enabled cookers offer warranty coverage, as noted in reviews.
Is It Safe for Travel?
Portable electric cooker models, like 3-quart timer-enabled cookers, are travel-safe if voltage-compatible. Pack securely and check airline rules for smart models with batteries. Use in hotels with stable power and Wi-Fi to ensure electric cooker safety and timer functionality.
Conclusion
This electric cooker with timer guide highlights the convenience, precision, and versatility of timer-enabled electric cookers, making them a top choice for 2025 kitchens. With intuitive electric cooker setup, diverse electric cooker recipes, and robust troubleshooting, these appliances simplify meal prep for beginners and busy cooks. Choose a reliable model, maintain it well, and cook with confidence.
Ready to find the perfect timer-enabled cooker? Discover more electric cooking tips to master your cooking in 2025!