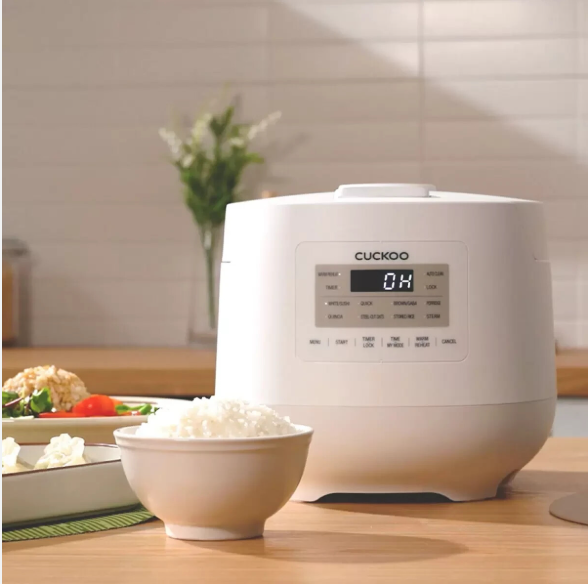
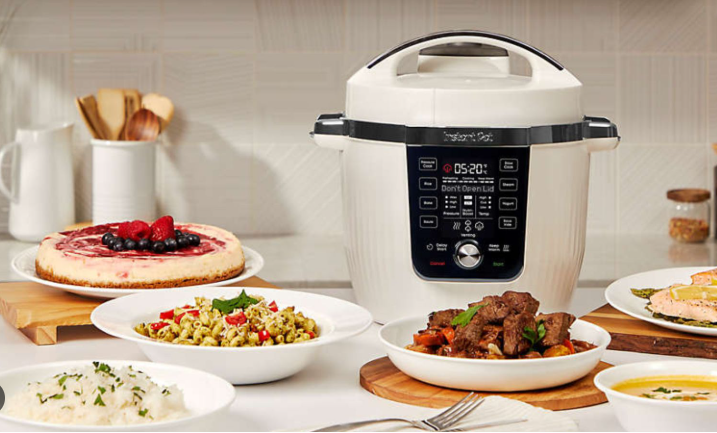
Electric cookers, such as pressure cookers and multicookers, are essential kitchen appliances, but over time, parts like sealing rings, inner pots, or steam valves may wear out, affecting performance. Knowing how to replace electric cooker parts can save you money and extend your appliance’s lifespan. This comprehensive guide provides clear instructions for replacing common components, along with cooker setup, cooker maintenance, cooker safety, and cooker troubleshooting tips to ensure smooth operation. Whether you’re using a portable cooker like the Instant Pot Duo Mini or a high-end model like the Ninja Foodi, this best cooker guide will help you keep your electric cooker in top shape. Let’s get started!
Why Replace Electric Cooker Parts?
Components like sealing rings, inner pots, and valves undergo regular wear due to heat, pressure, and frequent use. Replacing these parts restores functionality, prevents issues like steam leaks or burn warnings, and ensures safe cooking. This guide focuses on how to replace electric cooker parts for popular models in 2025, such as the Instant Pot, Ninja Foodi, and CHEF iQ. By addressing these replacements yourself, you can avoid costly repairs or premature replacement of the entire appliance. For more insights, check out this electric cooker resource.
Common Electric Cooker Parts to Replace
Before diving into the replacement process, let’s identify the most commonly replaced parts in electric cookers:
- Sealing Ring: A silicone gasket that ensures a tight seal during pressure cooking. It wears out or retains odors after 12–18 months.
- Inner Pot: The cooking pot (nonstick or stainless steel) may develop scratches or dents, affecting performance.
- Steam Release Valve: Controls pressure release; can become clogged or worn, causing pressure issues.
- Float Valve: Indicates pressure levels; may stick or fail due to debris or wear.
- Power Cord: Can fray or become damaged, posing safety risks.
- Lid Components: Gaskets or handles may loosen or crack over time.
Always purchase manufacturer-approved replacement parts to ensure compatibility and safety. Check your cooker’s manual or the manufacturer’s website for part numbers specific to your model.
Step-by-Step Guide: How to Replace Electric Cooker Parts
Follow these steps to replace common electric cooker parts safely and effectively. Always unplug the cooker and let it cool before starting any replacement.
1. Replacing the Sealing Ring
Why Replace: Worn or odor-retaining sealing rings cause steam leaks or pressure buildup failures.
Tools Needed: Replacement silicone sealing ring (specific to your model, e.g., Instant Pot 6-quart ring).
Steps:
- Remove the old sealing ring from the lid’s groove. Gently pull it out, noting its position.
- Clean the groove with warm, soapy water to remove debris or residue.
- Insert the new sealing ring, ensuring it fits snugly and evenly in the groove.
- Check alignment by closing the lid on the cooker to confirm a tight seal.
- Run a water test (1 cup water, 5-minute pressure cycle) to ensure no leaks.
Cost: $8–$15
Tip: Keep a spare sealing ring for savory and sweet dishes to avoid odor transfer.
2. Replacing the Inner Pot
Why Replace: Scratched nonstick coatings or dented pots can cause sticking or uneven cooking.
Tools Needed: Replacement inner pot (nonstick or stainless steel, model-specific).
Steps:
- Remove the old pot from the cooker base.
- Inspect the new pot for compatibility (check size and material, e.g., 6-quart for Instant Pot Duo).
- Place the new pot in the cooker base, ensuring it sits flat and secure.
- Wash the new pot with soapy water before use.
- Test with a simple recipe (e.g., rice) to confirm proper heating.
Cost: $15–$40
Tip: Opt for stainless steel pots for durability if your cooker supports them.
3. Replacing the Steam Release Valve
Why Replace: A clogged or worn valve can prevent pressure buildup or safe steam release.
Tools Needed: Replacement steam valve (model-specific).
Steps:
- Locate the steam release valve on the lid (consult the manual for exact placement).
- Gently twist or pull the old valve to remove it, following manufacturer instructions.
- Insert the new valve, ensuring it clicks into place or aligns correctly.
- Test by running a 5-minute pressure cycle with 1 cup of water.
Cost: $5–$15
Tip: Clean the valve regularly to avoid frequent replacements.
4. Replacing the Float Valve
Why Replace: A stuck or damaged float valve can cause pressure issues or inaccurate readings.
Tools Needed: Replacement float valve and silicone cap.
Steps:
- Locate the float valve on the lid’s underside (refer to the manual).
- Remove the old valve and cap by gently pulling or unscrewing (model-dependent).
- Install the new valve and cap, ensuring a secure fit.
- Test with a water cycle to confirm proper movement.
Cost: $5–$10
Tip: Clean the float valve after each use to prevent sticking.
5. Replacing the Power Cord
Why Replace: A frayed or damaged cord poses a safety hazard and prevents the cooker from powering on.
Tools Needed: Replacement power cord (model-specific).
Steps:
- Unplug the cooker and inspect the old cord for damage.
- Remove the old cord from the cooker’s base (some models require unscrewing a panel).
- Attach the new cord, ensuring a secure connection.
- Plug into a grounded outlet and test the cooker’s power.
Cost: $10–$25
Tip: Use a surge protector to prevent future cord damage.
Cooker Setup: Preparing for Replacement
Proper cooker setup before replacing parts ensures safety and success:
- Unplug and Cool: Disconnect the cooker from power and let it cool completely.
- Identify Parts: Confirm the part number and compatibility using the manual or manufacturer’s website.
- Gather Tools: Most replacements require no tools, but a soft cloth and soapy water are useful for cleaning.
- Test After Replacement: Run a water test (1 cup water, 5-minute pressure cycle) to verify functionality.
For detailed setup tips, visit cooker guide.
Cooker Safety: Avoiding Risks During Replacement
Cooker safety is critical when replacing parts:
- Unplug the Cooker: Always disconnect from power to avoid electric shock.
- Avoid Wet Hands: Ensure hands are dry when handling electrical components like the power cord.
- Use Approved Parts: Non-compatible parts can cause malfunctions or safety hazards.
- Check for Damage: Inspect new parts for defects before installation.
If you’re unsure about a replacement, consult a professional to avoid damaging the cooker or risking injury.
Cooker Maintenance: Preventing Frequent Replacements
Regular cooker maintenance reduces the need for part replacements:
- Clean After Use: Wash the inner pot and lid components with soapy water. Most parts are dishwasher-safe.
- Sealing Ring Care: Soak the silicone ring in a baking soda solution (1 tbsp in 1 cup water) to remove odors.
- Valve Maintenance: Clean steam and float valves with a soft brush to prevent clogs.
- Store Properly: Store the cooker in a dry place with the lid upside down to preserve the sealing ring.
For more cooker maintenance tips, explore cooking tips.
Cooker Troubleshooting: When Replacements Don’t Solve Issues
If replacing parts doesn’t resolve problems, try these cooker troubleshooting steps:
- Burn Warning: Ensure at least 1 cup of thin liquid and scrape stuck food from the pot.
- Steam Leaks: Double-check the new sealing ring’s alignment and the lid’s lock.
- No Power: Verify the new power cord is securely connected and the outlet is functional.
- Slow Pressure Buildup: Confirm the new steam or float valve is installed correctly and free of debris.
If issues persist, the cooker may have internal faults (e.g., heating element or control board). Contact the manufacturer for professional repair.
Cooker Battery Life and Power Considerations
Electric cookers don’t rely on cooker battery life, as they require a constant power supply (700–1500 watts). When replacing the power cord, ensure the new cord matches the cooker’s wattage requirements. For off-grid use (e.g., camping or RVs), pair with a generator or high-capacity power bank. Use a surge protector to prevent electrical damage to the cooker’s components.
Where to Find Replacement Parts
Purchase parts from:
- Manufacturer’s Website: Brands like Instant Pot, Ninja, or CHEF iQ sell model-specific parts.
- Authorized Retailers: Check trusted retailers for compatible parts, ensuring they match your cooker’s model number.
- Customer Support: Contact the manufacturer for guidance on part compatibility or warranty-covered replacements.
Avoid third-party or generic parts, as they may not fit properly or meet safety standards.
Cooker Tips for Successful Part Replacement
These cooker tips ensure smooth replacements:
- Always consult the manual for model-specific instructions.
- Keep spare sealing rings and clean them regularly to avoid frequent replacements.
- Test the cooker after each replacement to confirm functionality.
- Store replacement parts in a dry, organized space for easy access.
User Feedback on Replacing Electric Cooker Parts
Users report that replacing parts like sealing rings or inner pots is straightforward and cost-effective. One user shared, “Swapping the sealing ring on my Instant Pot fixed the steam leak in minutes!” Another noted, “The new stainless steel pot made my Ninja Foodi cook evenly again.” Some users find power cord replacements trickier, requiring careful alignment, but manufacturer support often resolves issues quickly.
How to Use Electric Cooker After Replacement
After replacing parts, follow these steps for how to use electric cooker safely:
- Run a water test to ensure the new part functions correctly.
- Start with a simple recipe (e.g., rice or steamed vegetables) to test performance.
- Monitor for leaks or unusual noises during the first few uses.
- Follow recipe guidelines for liquid ratios and cooking times to avoid issues.
Conclusion: Mastering How to Replace Electric Cooker Parts
Learning how to replace electric cooker parts is a valuable skill that keeps your appliance running smoothly and saves money on repairs. By following this guide, you can confidently replace sealing rings, inner pots, valves, and power cords while maintaining cooker safety and performance. With proper cooker setup, cooker maintenance, and cooker troubleshooting, your portable cooker or high-end model will continue delivering delicious meals. For more recipes and maintenance tips, visit electriccookerreview.com to explore the best cooker guide for your kitchen!