The smell of burnt food is undeniably frustrating, especially when it clings stubbornly to your favorite electric cooker. Whether it’s the remnants of an overcooked meal or a forgotten pot of rice, burnt food can seem like a monumental cleaning challenge. However, with the right approach and a bit of patience, you can restore your electric cooker’s inner pot to its pristine condition without resorting to harsh chemicals or damaging its surface. This guide will walk you through proven methods, from gentle soaks to tackling the toughest stains, ensuring your cooker is ready for its next culinary task.
Understanding why food burns in an electric cooker is the first step toward effective cleaning and prevention. Starchy foods like rice, sugary sauces, and proteins can easily stick and scorch if left unattended or if insufficient liquid is used. This can result in anything from a light brown film to a hardened, black crust that seems impossible to dislodge. The residue can vary in tenacity, requiring different levels of cleaning intervention.
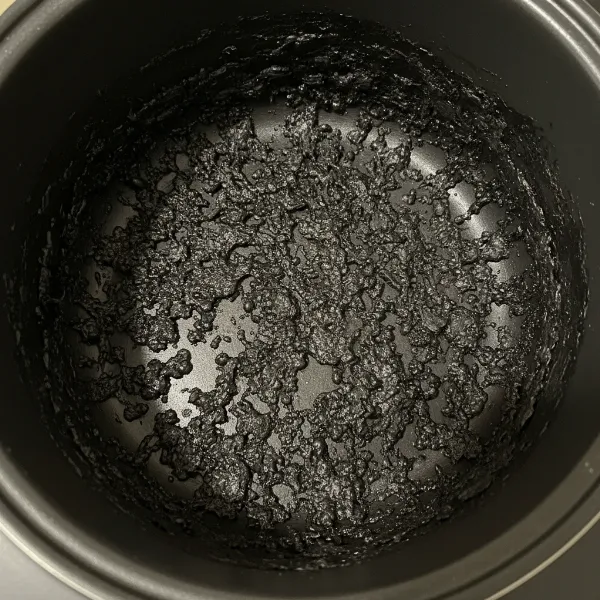 A close-up of a severely burnt electric cooker inner pot with stubborn, black food residue.
Before you begin any cleaning process, safety is paramount. Always ensure your electric cooker is unplugged from the power outlet and completely cool. Remove the inner pot from the unit. It’s also a good practice to consult your cooker’s instruction manual, as some manufacturers may have specific cleaning recommendations or warnings, particularly for non-stick surfaces.
To arm yourself for this cleaning mission, gather a few common household items. You’ll need baking soda, white vinegar, dish soap, and warm water. For tools, have a non-abrasive sponge or cloth ready. A plastic or silicone scraper can be helpful for particularly stubborn bits, especially if your pot has a non-stick coating. An old toothbrush can also be handy for reaching into crevices. For stainless steel pots, a product like Bar Keepers Friend can be effective, but always use it with caution and thorough rinsing.
Step-by-Step Methods for Cleaning Burnt Food
Removing burnt food requires a methodical approach, often starting with the gentlest methods and escalating if necessary. Patience is key, as allowing solutions to soak will significantly reduce the need for aggressive scrubbing.
Method 1: The Gentle Soak with Dish Soap and Baking Soda
|
Our Picks for the Best Electric cooker in 2026
As an Amazon Associate I earn from qualifying purchases.
|
||
| Num | Product | Action |
|---|---|---|
| 1 | Dezin Hot Pot Electric with Steamer Upgraded, Non-Stick Sauté Pan, Rapid Noodles Electric Pot, 1.5L Mini Pot for Steak, Egg, Fried Rice, Ramen, Oatmeal, Soup with Power Adjustment |

|
| 2 | Elite Gourmet EG808 8” x 8" Non-stick Electric Skillet, Dishwasher Safe with Tempered Glass Vented Lid, Rapid Heat Up, 600W, Black |
|
| 3 | Green 1L Mini Slow Cooker with Steamer Basket, 200W Smart Ceramic Electric Stew Pot, 24-Hour Timer & Auto Keep-Warm, Dry-Burn Protection, Kitchen Cooking Appliance |
|
| 4 | Dezin Hot Pot Electric Upgraded, Non-Stick Sauté Pan, Rapid Noodles Electric Pot, 1.5L Mini Portable Hot Pot for Steak, Egg, Fried Rice, Ramen, Oatmeal, Soup with Power Adjustment |
|
| 5 | AMZCHEF Portable Induction Cooktop 20 Temperature & Power Levels, 1800W Induction Stove Burner with 6.8" Heating Coil, Low Noise Hot Plate Single Electric Cooktops Countertop Stove with Timer |
|
| 6 | Dezin Hot Pot Electric with Steamer Upgraded, Non-Stick Sauté Pan, Rapid Noodles Electric Pot, 1.5L Mini Pot for Steak, Egg, Fried Rice, Ramen, Oatmeal, Soup with Power Adjustment |
|
| 7 | Pink 1L Ceramic Slow Cooker with Steamer Basket, 200W Mini Electric Stew Pot, 24-Hour Delayed Start & Auto Keep-Warm, Household Kitchen Safety Dry-Burn Protection Porridge & Soup Pot |
|
| 8 | Dezin Hot Pot Electric with Steamer Upgraded, Non-Stick Sauté Pan, Rapid Noodles Electric Pot, 1.5L Mini Pot for Steak, Egg, Fried Rice, Ramen, Oatmeal, Soup with Power Adjustment |
|
| 9 | Instant Pot Duo 7-in-1 Mini Electric Pressure Cooker, Slow Rice Cooker, Steamer, Sauté, Yogurt Maker, Warmer & Sterilizer, Includes Free App with over 1900 Recipes, Stainless Steel, 3 Quart |
|
| 10 | Dezin Hot Pot Electric with Steamer Upgraded, Non-Stick Sauté Pan, Rapid Noodles Electric Pot, 1.5L Mini Pot for Steak, Egg, Fried Rice, Ramen, Oatmeal, Soup with Power Adjustment |
|
This method is ideal for lighter burns or moderately stuck-on food. It leverages the degreasing power of dish soap and the mild abrasive and alkaline properties of baking soda to loosen residue.
First, scrape away any loose, unburnt food particles from the inner pot using a spoon or spatula. Next, fill the burnt inner pot with enough warm water to cover the affected area. Add a generous squirt of dish soap and approximately two to three tablespoons of baking soda. Stir the mixture gently to dissolve the baking soda. Allow the pot to soak for at least 30 minutes, or for several hours if the burnt food is more persistent. Once soaked, drain the water and use a non-abrasive sponge or cloth to gently scrub away the loosened residue. Rinse the pot thoroughly with clean water and dry it completely.
Method 2: The Vinegar and Baking Soda Power Duo
For more stubborn or heavily burnt food, the combination of vinegar and baking soda offers a stronger chemical reaction to break down the hardened residue.
Begin by removing any large, loose pieces of burnt food. Fill the inner pot with enough water to cover the burnt area, then add 1/2 to 1 cup of white vinegar. If your inner pot is safe for stovetop use, you can gently bring this mixture to a simmer on low heat for 5-10 minutes. This helps to loosen the burnt particles. If not, simply use very hot water with the vinegar and let it sit for at least an hour. After the simmering or soaking, let the solution cool completely, then carefully pour out the water and vinegar.
Now, sprinkle a generous layer of baking soda directly over the remaining burnt areas. For an extra fizzing action that helps lift residue, you can spray a little more white vinegar over the baking soda. Allow this paste to sit for at least 15-30 minutes, or even overnight for the toughest stains. The chemical reaction between the acid (vinegar) and the base (baking soda) helps to physically lift and break down the burnt food. Finally, use a non-abrasive sponge or a plastic scraper to gently scrub away the residue. Rinse the pot thoroughly and dry it.
Method 3: Targeting Tough Spots with Baking Soda Paste
Sometimes, only specific areas have particularly stubborn burnt marks. This method focuses on those concentrated spots.
Drain any liquid from the pot and create a thick paste using baking soda and a minimal amount of water. The consistency should be similar to toothpaste. Apply this thick paste directly onto the localized burnt spots, ensuring they are fully covered. Let the paste sit for several hours, or ideally, overnight. This prolonged contact allows the baking soda to work its magic, softening the hardened burnt food. After soaking, gently scrub the paste away with a soft sponge or cloth. You may need to apply a little elbow grease, but always avoid harsh scrubbing that could damage the pot’s surface. Rinse the pot thoroughly and dry it.
Special Considerations for Inner Pot Materials
The material of your electric cooker’s inner pot dictates the care required during cleaning. Understanding these differences can prevent accidental damage.
Non-Stick Coatings
Many electric cookers come with non-stick inner pots for convenience. While easy to cook with, they require extra care when cleaning burnt food. Always use only plastic or silicone tools when scraping or stirring to avoid scratching the delicate non-stick surface. Opt for soft sponges or cloths for scrubbing. Harsh abrasive powders, metal scrubbers, or razor blades can permanently damage the non-stick coating, making it less effective and potentially releasing harmful chemicals into your food. Stick to mild dish soap, baking soda, and vinegar.
Stainless Steel
Stainless steel inner pots are more durable and can withstand slightly more aggressive cleaning. While you should still avoid steel wool to prevent fine scratches, a slightly firmer non-abrasive scrubber can be used. For very stubborn burns on stainless steel, products containing oxalic acid, like Bar Keepers Friend, can be highly effective. Apply it according to the product instructions, rub gently with a damp cloth, and rinse meticulously to remove all residue. Always test in an inconspicuous area first if unsure.
Preventing Future Burnt Food Incidents
The best way to deal with burnt food is to prevent it from happening in the first place. A few simple practices can save you time and effort in cleaning.
Always ensure you add the correct amount of liquid for your recipe, as specified in your cooker’s manual. Don’t overcrowd the pot; overfilling can lead to uneven cooking and scorching at the bottom. For starchy foods like rice, giving it a proper rinse before cooking and stirring it adequately can prevent sticking. Adhere to recommended cooking times and settings, and avoid leaving food on the “keep warm” setting for excessively long periods, which can sometimes lead to slight scorching. Regularly wipe down the heating element area of your cooker to ensure it’s free from debris that could interfere with cooking performance.
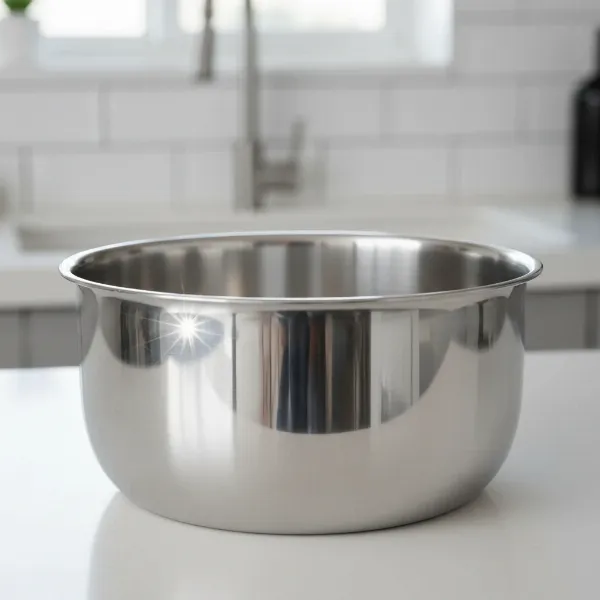 A spotless, gleaming electric cooker inner pot, free from any burnt food or stains, ready for use.
Conclusion
Encountering burnt food in your electric cooker can be disheartening, but it’s a common problem with straightforward solutions. By understanding the different methods available – from gentle soaks with dish soap and baking soda to the powerful combination of vinegar and baking soda – you can effectively tackle any burnt-on residue. Remember to always prioritize safety by unplugging your cooker and letting it cool, and to choose cleaning methods appropriate for your inner pot’s material, especially non-stick coatings. Regular maintenance and preventative measures will keep your electric cooker in top condition, ensuring perfectly cooked meals every time. So, next time you face a burnt mess, approach it with patience and confidence, knowing you have the tools to make your cooker shine again.
What steps do you take to prevent food from burning in your electric cooker?
Frequently Asked Questions
Can I use steel wool on my electric cooker’s inner pot?
No, it’s generally not recommended. Steel wool can scratch non-stick coatings and even stainless steel, leading to potential damage and making future food stick more easily. Always opt for non-abrasive sponges or plastic scrubbers to protect your pot.
How often should I clean my electric cooker?
The inner pot should be cleaned after every use to prevent food residue buildup and maintain hygiene. The exterior and heating element area should be wiped down regularly, at least once a week or as needed, to ensure efficient and safe operation.
Is it safe to use oven cleaner on my electric cooker’s inner pot?
No, oven cleaners are typically too harsh for Electric Cooker inner pots. They contain strong chemicals that can damage delicate non-stick coatings and, if not rinsed absolutely thoroughly, could pose a risk of contaminating your food. Stick to gentler, natural methods.
What if my electric cooker still smells burnt after cleaning?
A lingering burnt smell might indicate some residue is still present, possibly in tiny crevices or under the rim of the pot. Try a deeper soak with a vinegar and water solution, or rub the interior with a fresh lemon half (then rinse thoroughly) to help neutralize persistent odors and leave a fresh scent.