Is your electric cooker producing inconsistent results, burning food, or failing to heat up correctly? A faulty thermostat is often the culprit behind these common kitchen frustrations. The thermostat is the unsung hero of your oven, meticulously regulating the temperature to ensure your culinary creations are cooked to perfection. When it malfunctions, your cooking can suffer.
Fortunately, diagnosing a problematic thermostat is a task many home cooks can tackle with the right tools and a little know-how. This guide will walk you through two primary methods for testing your electric cooker’s thermostat, helping you identify if it’s time for a repair or replacement.
Safety First: Always Disconnect Power
Before attempting any checks or repairs on your electric cooker, safety must be your top priority. Always unplug the appliance from the wall socket or switch off the corresponding circuit breaker at your home’s main electrical panel. Ensure the cooker has completely cooled down before touching any internal components to prevent electric shock or burns.
Method 1: The Oven Thermometer Test (Quick and Easy)
This method provides a straightforward way to gauge your oven’s temperature accuracy without disassembling any parts. While it doesn’t offer a definitive electrical diagnosis, it’s excellent for identifying temperature discrepancies.
What You’ll Need:
- An accurate oven thermometer (readily available online or at kitchen supply stores)
Steps:
- Position the Thermometer: Place your oven thermometer in the center of the oven cavity. Ensure it’s not touching the racks or walls, which could skew the reading.
- Set the Temperature: Close the oven door and set your electric cooker to a commonly used temperature, such as 350°F (177°C).
- Allow to Stabilize: Let the oven preheat completely and then allow an additional 20 minutes for the internal temperature to stabilize. Oven thermostats cycle on and off to maintain heat, so waiting ensures an accurate average reading.
- Read the Temperature: Check the temperature displayed on your oven thermometer.
- Interpret the Results:
- Accurate: If the thermometer reading matches the set temperature, or is within a 10-degree Fahrenheit margin, your thermostat is likely functioning correctly in terms of temperature regulation.
- Inaccurate: If the thermometer consistently reads significantly higher or lower than the set temperature (e.g., more than 10°F difference), your thermostat may be inaccurate or faulty.
Our Picks for the Best Electric cooker in 2026As an Amazon Associate I earn from qualifying purchases.Num Product Action 1 Dezin Hot Pot Electric with Steamer Upgraded, Non-Stick Sauté Pan, Rapid Noodles Electric Pot, 1.5L Mini Pot for Steak, Egg, Fried Rice, Ramen, Oatmeal, Soup with Power Adjustment 
2 Green 1L Mini Slow Cooker with Steamer Basket, 200W Smart Ceramic Electric Stew Pot, 24-Hour Timer & Auto Keep-Warm, Dry-Burn Protection, Kitchen Cooking Appliance
3 Instant Pot Duo 7-in-1 Mini Electric Pressure Cooker, Slow Rice Cooker, Steamer, Sauté, Yogurt Maker, Warmer & Sterilizer, Includes Free App with over 1900 Recipes, Stainless Steel, 3 Quart
4 Dezin Hot Pot Electric with Steamer Upgraded, Non-Stick Sauté Pan, Rapid Noodles Electric Pot, 1.5L Mini Pot for Steak, Egg, Fried Rice, Ramen, Oatmeal, Soup with Power Adjustment
5 Dezin Hot Pot Electric with Steamer Upgraded, Non-Stick Sauté Pan, Rapid Noodles Electric Pot, 1.5L Mini Pot for Steak, Egg, Fried Rice, Ramen, Oatmeal, Soup with Power Adjustment
6 AMZCHEF Portable Induction Cooktop 20 Temperature & Power Levels, 1800W Induction Stove Burner with 6.8" Heating Coil, Low Noise Hot Plate Single Electric Cooktops Countertop Stove with Timer
7 Pink 1L Ceramic Slow Cooker with Steamer Basket, 200W Mini Electric Stew Pot, 24-Hour Delayed Start & Auto Keep-Warm, Household Kitchen Safety Dry-Burn Protection Porridge & Soup Pot
8 Dezin Hot Pot Electric Upgraded, Non-Stick Sauté Pan, Rapid Noodles Electric Pot, 1.5L Mini Portable Hot Pot for Steak, Egg, Fried Rice, Ramen, Oatmeal, Soup with Power Adjustment
9 Dezin Hot Pot Electric with Steamer Upgraded, Non-Stick Sauté Pan, Rapid Noodles Electric Pot, 1.5L Mini Pot for Steak, Egg, Fried Rice, Ramen, Oatmeal, Soup with Power Adjustment
10 Elite Gourmet EG808 8” x 8" Non-stick Electric Skillet, Dishwasher Safe with Tempered Glass Vented Lid, Rapid Heat Up, 600W, Black
- Repeat for Confirmation: For greater accuracy, allow the oven to cool completely and repeat the test two to three times. Consistent discrepancies confirm an issue.
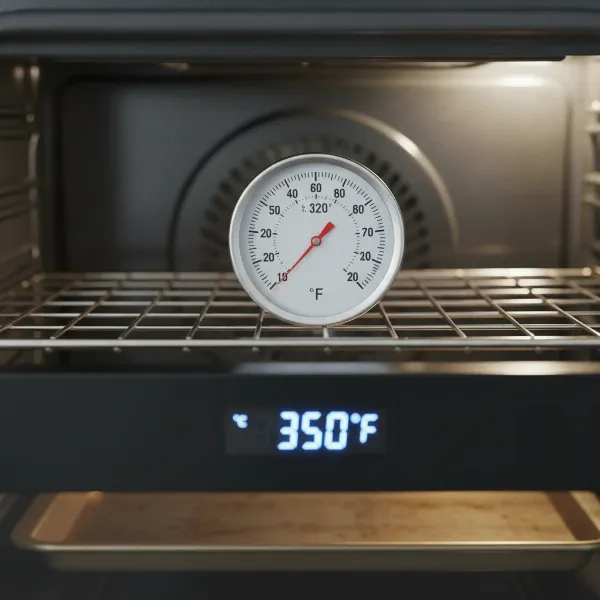 Oven thermometer showing a significant temperature difference from the set value, indicating a faulty thermostat.
What to Do Next: If your oven thermometer consistently shows inaccurate temperatures, you might be able to recalibrate your oven (check your cooker’s user manual for instructions). Alternatively, you can manually adjust your cooking temperatures to compensate for the difference. For example, if your oven runs 20 degrees cold, set it 20 degrees higher than the recipe calls for.
Method 2: The Multimeter Test (Accurate Electrical Diagnosis)
For a precise electrical assessment of your thermostat’s functionality, a multimeter is the tool of choice. This method tests the thermostat’s continuity or resistance, indicating whether it’s electrically sound.
What You’ll Need:
- A multimeter (digital multimeters are generally easier to read)
- Screwdrivers (various types, depending on your cooker)
- Pliers (for disconnecting wires, if needed)
Steps:
- Ensure Safety: Double-check that your electric cooker is unplugged from its power source and completely cool.
- Access the Thermostat: The location of your thermostat can vary. Common places include behind the main control panel, behind the back panel of the oven, or sometimes under the exhaust hood or backsplash. You may need to remove screws and panels to expose the component. Refer to your cooker’s diagram or an online guide for your specific model.
- Identify the Thermostat: The thermostat typically appears as a component with a temperature sensing bulb (a thin metal tube) that extends into the oven cavity, connected to a control dial or electronic board.
- Disconnect Wires: Carefully disconnect the electrical wires attached to the thermostat terminals. Take a photo or note their original positions to ensure correct reassembly.
- Remove the Thermostat (Recommended): For the most accurate reading, it’s often best to fully uninstall the thermostat and its sensing bulb assembly from the appliance.
- Set Up the Multimeter:
- Turn your multimeter dial to the ohms (Ω) setting, specifically the lowest range for resistance, or to the continuity setting (often indicated by a speaker icon that beeps when a circuit is complete).
- Calibrate the multimeter if necessary, by touching the two probes together to ensure a reading of zero or near-zero ohms, or a beep in continuity mode.
- Perform the Test:
- For Continuity: Place one multimeter probe on each of the thermostat’s primary electrical terminals. If your thermostat has more than two terminals, consult your cooker’s wiring diagram to identify the main cycling terminals.
- Turn the thermostat dial to an “On” position, typically a low to medium temperature setting.
- A properly working thermostat should show continuity (a beep sound, or a reading of zero or very low ohms). If there’s no sound or an “OL” (open line) reading, the thermostat is faulty.
- For Resistance (if testing a temperature sensor): Some ovens use a separate temperature sensor. If you are testing this type of sensor, connect the probes to its terminals.
- At room temperature (around 70°F or 21°C), a properly functioning sensor will typically show a resistance reading of approximately 1080 ohms.
- Readings that are significantly too high, too low, “OL” (open), or shorted indicate a bad sensor.
- For Continuity: Place one multimeter probe on each of the thermostat’s primary electrical terminals. If your thermostat has more than two terminals, consult your cooker’s wiring diagram to identify the main cycling terminals.
- Interpret Multimeter Results:
- Working: A continuity beep (or near-zero ohms) on a mechanical thermostat when “on,” or a specific resistance reading (e.g., 1080 ohms) for a sensor, indicates it’s likely functioning electrically.
- Faulty: No continuity (no beep, “OL” reading) on a mechanical thermostat, or wildly inaccurate resistance readings for a sensor, means the component has failed and needs replacement.
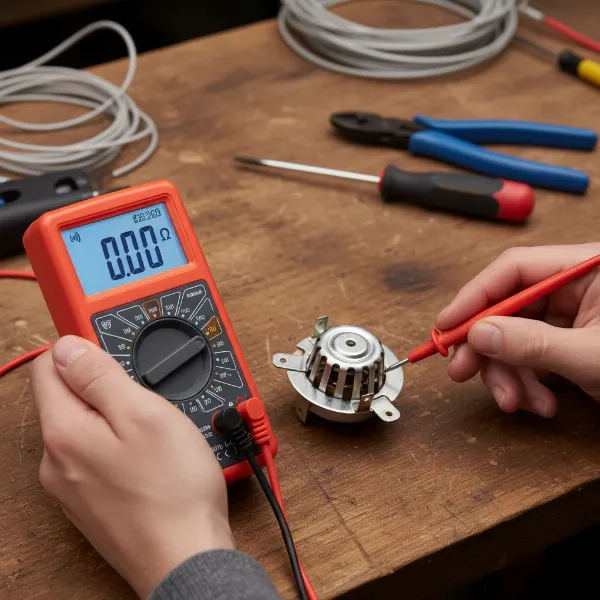 Hand holding multimeter probes on oven thermostat terminals, showing continuity reading for electrical diagnosis.
What to Do if Your Thermostat is Faulty
If either test indicates a faulty thermostat, it will need to be replaced. Replacing a cooker thermostat is a common repair for experienced DIYers. You’ll need to purchase a compatible replacement part for your specific cooker model. If you’re uncomfortable with electrical work or extensive disassembly, it’s always best to consult a qualified appliance repair technician.
By understanding how to test your Electric Cooker’s thermostat, you can accurately diagnose heating issues and take the necessary steps to restore your appliance to optimal working condition.