Imagine a world where creamy, tangy yogurt is always fresh, perfectly tailored to your taste, and free from artificial additives. This world is easily within reach with the help of a temperature-controlled cooker. While making yogurt at home might seem daunting, modern appliances simplify the process, turning it into a rewarding and straightforward culinary adventure. This comprehensive guide will walk you through everything you need to know, from selecting the right ingredients to mastering the perfect texture and troubleshooting common issues, ensuring your homemade yogurt is a consistent success.
Understanding Your Temperature-Controlled Cooker
|
Our Picks for the Best Electric cooker in 2026
As an Amazon Associate I earn from qualifying purchases.
|
||
| Num | Product | Action |
|---|---|---|
| 1 | Green 1L Mini Slow Cooker with Steamer Basket, 200W Smart Ceramic Electric Stew Pot, 24-Hour Timer & Auto Keep-Warm, Dry-Burn Protection, Kitchen Cooking Appliance |

|
| 2 | Dezin Hot Pot Electric Upgraded, Non-Stick Sauté Pan, Rapid Noodles Electric Pot, 1.5L Mini Portable Hot Pot for Steak, Egg, Fried Rice, Ramen, Oatmeal, Soup with Power Adjustment |
|
| 3 | AMZCHEF Portable Induction Cooktop 20 Temperature & Power Levels, 1800W Induction Stove Burner with 6.8" Heating Coil, Low Noise Hot Plate Single Electric Cooktops Countertop Stove with Timer |
|
| 4 | Dezin Hot Pot Electric with Steamer Upgraded, Non-Stick Sauté Pan, Rapid Noodles Electric Pot, 1.5L Mini Pot for Steak, Egg, Fried Rice, Ramen, Oatmeal, Soup with Power Adjustment |
|
| 5 | Dezin Hot Pot Electric with Steamer Upgraded, Non-Stick Sauté Pan, Rapid Noodles Electric Pot, 1.5L Mini Pot for Steak, Egg, Fried Rice, Ramen, Oatmeal, Soup with Power Adjustment |
|
| 6 | Pink 1L Ceramic Slow Cooker with Steamer Basket, 200W Mini Electric Stew Pot, 24-Hour Delayed Start & Auto Keep-Warm, Household Kitchen Safety Dry-Burn Protection Porridge & Soup Pot |
|
| 7 | Instant Pot Duo 7-in-1 Mini Electric Pressure Cooker, Slow Rice Cooker, Steamer, Sauté, Yogurt Maker, Warmer & Sterilizer, Includes Free App with over 1900 Recipes, Stainless Steel, 3 Quart |
|
| 8 | Elite Gourmet EG808 8” x 8" Non-stick Electric Skillet, Dishwasher Safe with Tempered Glass Vented Lid, Rapid Heat Up, 600W, Black |
|
| 9 | Dezin Hot Pot Electric with Steamer Upgraded, Non-Stick Sauté Pan, Rapid Noodles Electric Pot, 1.5L Mini Pot for Steak, Egg, Fried Rice, Ramen, Oatmeal, Soup with Power Adjustment |
|
| 10 | Dezin Hot Pot Electric with Steamer Upgraded, Non-Stick Sauté Pan, Rapid Noodles Electric Pot, 1.5L Mini Pot for Steak, Egg, Fried Rice, Ramen, Oatmeal, Soup with Power Adjustment |
|
A temperature-controlled cooker is your secret weapon for consistent homemade yogurt. These appliances are designed to maintain a precise and stable temperature for extended periods, which is crucial for the delicate process of yogurt fermentation. Unlike traditional methods that rely on ambient room temperature or finicky insulation, a dedicated yogurt maker, a multi-cooker with a yogurt function (like an Instant Pot), or even a thermal cooker provides the ideal environment for beneficial bacteria to thrive. This consistent heat encourages the cultures to convert lactose in the milk into lactic acid, transforming liquid milk into thick, flavorful yogurt. The beauty of these devices lies in their hands-off nature, allowing you to set it and forget it, minimizing the chances of temperature fluctuations that can lead to runny or unsuccessful batches.
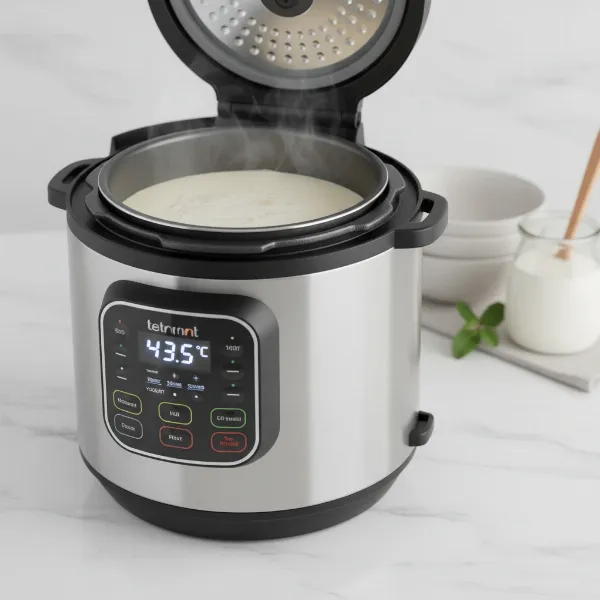 Dedicated yogurt maker or multi-cooker maintaining precise temperature for perfect homemade yogurt.
Essential Ingredients for Homemade Yogurt
Crafting delicious homemade yogurt begins with selecting the right ingredients. The quality of your milk and starter culture will significantly impact the final taste and texture of your yogurt.
- Milk: Most dairy milks, including whole milk, 2%, or skim milk, can be used. Whole milk typically yields a thicker, creamier yogurt. For best results, use pasteurized milk. Ultra-pasteurized (UHT) milk can sometimes lead to thinner yogurt because the intense heating process denatures proteins differently. If using non-dairy milk like soy or almond milk, look for recipes specifically formulated for them, as they may require additional thickeners.
- Yogurt Starter Culture: This is the cornerstone of your yogurt, providing the live active bacteria (like Lactobacillus bulgaricus and Streptococcus thermophilus) that ferment the milk. You can use:
- Plain store-bought yogurt with live active cultures: Ensure the label explicitly states “live active cultures.” Opt for a fresh, unflavored variety without additives.
- Freeze-dried yogurt starter powder: These provide specific strains for consistent results and can be a good option for your first batch.
- A portion of your previous homemade batch: Once you have a successful batch, you can use a few tablespoons as a starter for your next, often referred to as “re-culturing.”
- Optional Additions: For a thicker yogurt, you can whisk in a few tablespoons of dry milk powder per quart of milk before heating. Sweeteners or flavorings like honey or vanilla extract should only be added after the yogurt has finished culturing and cooled.
Step-by-Step Guide: Making Yogurt in Your Temperature-Controlled Cooker
Follow these steps closely for a successful batch of homemade yogurt every time.
Step 1: Sanitize Your Equipment
Before you begin, ensure all equipment that will come into contact with your milk or yogurt is thoroughly clean and sanitized. This prevents unwanted bacteria from interfering with your yogurt cultures. You can sterilize your cooker’s inner pot, lids, and utensils by boiling them briefly, running them through a dishwasher’s sanitizing cycle, or using a food-grade sanitizer.
Step 2: Heat and Pasteurize the Milk
Pour your milk into the inner pot of your temperature-controlled cooker (or a saucepan if your cooker requires pre-heating elsewhere).
- Target Temperature: Heat the milk to 180-194°F (82-90°C). Many recipes recommend holding the milk at this temperature for 10-30 minutes.
- Why this step is crucial: This initial heating serves two purposes:
- Pasteurization: It kills off any undesirable bacteria naturally present in the milk, giving your starter cultures a clean slate to work with.
- Protein Denaturation: It denatures the whey proteins in the milk, preventing them from separating and contributing to a thicker, creamier texture in your final yogurt.
- Using your cooker: Some multi-cookers have a “Boil” setting on their yogurt function that can handle this step automatically. If not, use the sauté or stovetop function, stirring occasionally to prevent scorching.
Step 3: Cool the Milk to Incubation Temperature
Once the milk has reached the desired high temperature, it’s time to cool it down. This is a critical step, as adding your starter to milk that is too hot will kill the beneficial bacteria.
- Target Temperature: Cool the milk to 105-115°F (40.6-46.1°C), with 110°F (43°C) often cited as ideal.
- How to cool: Remove the pot from heat (if using an external pot). You can allow it to cool at room temperature, stirring occasionally to prevent a skin from forming, or speed up the process by placing the pot in an ice bath.
- Importance of a thermometer: Use a reliable instant-read thermometer to accurately gauge the milk’s temperature. Do not guess.
Step 4: Introduce Your Yogurt Starter
Once the milk has cooled to the target incubation temperature (105-115°F), it’s time to add your starter culture.
- Preparation: Scoop out about 1 cup of the cooled milk into a separate small bowl. Add your yogurt starter (2-4 tablespoons of plain yogurt or one packet of freeze-dried starter) to this small bowl and whisk until smooth and fully dissolved, with no lumps. Bringing your store-bought yogurt starter to room temperature before adding can also aid in smooth incorporation.
- Combine: Pour this starter mixture back into the main pot of milk and whisk gently but thoroughly to ensure the cultures are evenly distributed.
Step 5: Incubate for Perfection
Now, the temperature-controlled cooker takes over.
- Setting the cooker: If using a multi-cooker, select the “Yogurt” function. For dedicated yogurt makers or thermal cookers, ensure the internal temperature will be maintained within the optimal 105-115°F (40.6-46.1°C) range.
- Incubation Time: Set the timer for 6-12 hours. The exact time depends on your preference:
- Shorter times (6-8 hours): Result in milder, less tangy yogurt.
- Longer times (10-12+ hours): Produce tangier, often thicker yogurt. Some ferment for up to 24 hours for maximum tang and probiotic content.
- Do Not Disturb: Resist the urge to open the lid or jostle the cooker during incubation, as this can disrupt the delicate fermentation process and lead to thinner yogurt.
Step 6: Chill and Enjoy
Once the incubation cycle is complete, your yogurt is ready.
- Cool Down: Turn off your cooker and allow the yogurt to cool down to room temperature for about an hour.
- Refrigerate: Cover the pot or transfer the yogurt into clean, airtight containers and refrigerate for at least 6 hours. Chilling allows the yogurt to fully set and thickens its consistency.
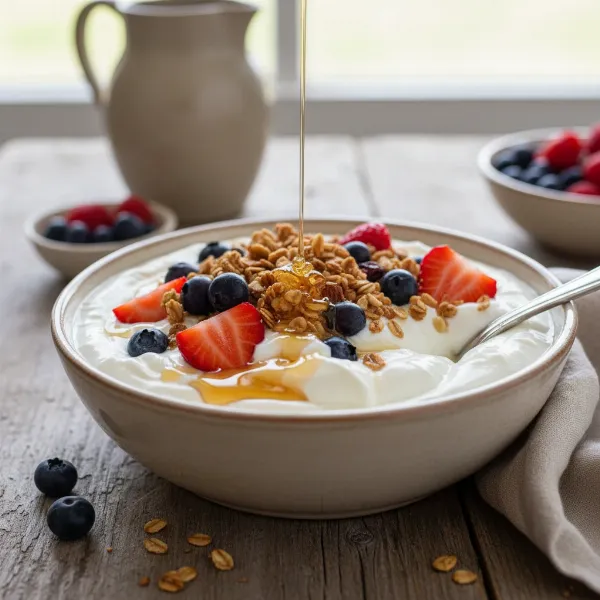 A beautiful bowl of creamy homemade yogurt with fresh fruit and honey.
Achieving Your Desired Yogurt Texture and Flavor
Customizing your yogurt is one of the joys of making it at home.
- For Thicker Yogurt:
- Strain it: For Greek yogurt, line a colander with cheesecloth and place it over a bowl. Pour the finished, chilled yogurt into the cheesecloth and let it drain in the refrigerator for a few hours (or overnight) until it reaches your desired thickness. The liquid drained is whey, which can be used in smoothies or baking.
- Add milk powder: As mentioned earlier, adding 2-4 tablespoons of dry milk powder per quart of milk before heating can significantly boost thickness.
- Longer high-heat hold: Holding your milk at 180-194°F (82-90°C) for a longer period (up to 30 minutes) denatures more proteins, resulting in a firmer set.
- For Tangier Yogurt: Increase the incubation time. The longer the cultures ferment, the more lactic acid they produce, leading to a more pronounced tangy flavor.
- For Creamier Yogurt: Use whole milk, or experiment with a blend of whole milk and heavy cream.
Choosing the Right Temperature-Controlled Cooker for Yogurt
The market offers several options for temperature-controlled cooking, each with unique advantages.
- Dedicated Yogurt Makers: These appliances are designed solely for making yogurt. They are often compact, energy-efficient, and maintain a consistent temperature range perfectly suited for culturing. They usually come with individual jars or a single large container.
- Multi-Cookers (e.g., Instant Pot): Many modern multi-cookers feature a “Yogurt” setting. These are incredibly versatile, allowing you to heat, boil, and incubate all in one pot. This convenience makes them a popular choice for larger batches.
- Thermal Cookers: These non-electric insulated cookers use retained heat to slowly cook food, including fermenting yogurt. You heat the milk on a stovetop, cool it, add the starter, and then transfer it to the thermal cooker for incubation. They require no electricity during the fermentation phase, making them energy-efficient for long incubation times.
When choosing, consider factors like your desired batch size, available kitchen space, and other cooking functions you might need.
Tips for Success and Avoiding Common Pitfalls
Even with the best equipment, a few key practices can make all the difference.
- Always use fresh starter: The vitality of your starter cultures diminishes over time. For optimal results, use a fresh store-bought yogurt or a portion from a recent batch of homemade yogurt (ideally within 5-7 days of making). Keep a backup in the freezer.
- Invest in a good thermometer: Accurate temperature control is paramount. A reliable instant-read thermometer is your most important tool.
- Avoid ultra-pasteurized milk: While convenient, UHT milk has been heated to such high temperatures that its protein structure can make it difficult for yogurt to set properly, often resulting in a thinner consistency.
- Do not disturb: Once incubation begins, let your cooker do its job. Moving or opening the lid repeatedly can cool the milk and halt fermentation.
- Experiment with ingredients: Different types of milk and starter cultures can yield varying results. Don’t be afraid to try different combinations to find your perfect yogurt.
- Keep things clean: Always sanitize your equipment to prevent any unwanted bacteria from spoiling your batch.
Troubleshooting Your Homemade Yogurt
Sometimes, things don’t go as planned. Here are solutions to common homemade yogurt problems:
- Runny or Not Setting Yogurt: This is the most frequent issue.
- Incubation temperature was too low or too high: The cultures died or didn’t activate. Ensure your thermometer is accurate and your cooker maintains the correct temperature.
- Starter culture was old or inactive: Use a fresh starter.
- Used ultra-pasteurized milk: Try regular pasteurized milk.
- Didn’t heat milk enough (or hold long enough): Revisit Step 2 to ensure proper protein denaturation.
- Disturbed fermentation: Avoid opening the lid or moving the cooker during incubation.
- Yogurt is Too Sour or Not Sour Enough:
- Too Sour: Reduce incubation time for future batches.
- Not Sour Enough: Increase incubation time.
- Unpleasant Odor or Taste:
- This often indicates contamination. Discard the batch, thoroughly clean and sanitize all equipment, and start with fresh milk and a new starter.
“The secret to consistently excellent yogurt lies not just in the ingredients, but in the unwavering control of its environment. Temperature is king.” – Lan, Electric Cooker Technician
Conclusion
Embracing the art of homemade yogurt with a temperature-controlled cooker is a rewarding experience that empowers you to create fresh, wholesome, and customizable dairy (or non-dairy) goodness right in your kitchen. From the initial pasteurization of milk to the gentle warmth of incubation, understanding and controlling the temperature is key to unlocking the creamy textures and delightful tangs you desire. With the right tools and a little practice, you’ll soon be enjoying superior yogurt that tastes incredible and offers numerous health benefits. So, why wait? Take control of your culinary journey and discover the simple pleasure of crafting your perfect batch today. What delicious toppings will you add to your next homemade yogurt creation?
Frequently Asked Questions
Can I use any milk for homemade yogurt?
While most dairy milks work, whole pasteurized cow’s milk typically yields the best results. Ultra-pasteurized (UHT) milk can lead to thinner yogurt, and non-dairy milks often require specific recipes and thickeners.
What’s the best temperature for incubating yogurt?
The ideal incubation temperature for yogurt cultures is between 105-115°F (40.6-46.1°C), with many experts recommending a steady 110°F (43°C) for optimal bacterial growth and fermentation.
How long does homemade yogurt last?
When stored in an airtight container in the refrigerator at temperatures below 40°F (4°C), homemade yogurt typically lasts for 10-21 days. Always check for signs of spoilage like mold or unusual odors before consuming.
My yogurt is too runny, what went wrong?
Common causes for runny yogurt include using an old or inactive starter, incorrect incubation temperatures (too hot or too cold), not heating the milk sufficiently, or using ultra-pasteurized milk. Ensure accurate temperatures and fresh ingredients.
Can I use store-bought yogurt as a starter?
Yes, you can use plain, unflavored store-bought yogurt as a starter, provided it explicitly states “live active cultures” on the label. Use about 2-4 tablespoons per quart of milk for your first batch.
What is “whey” and should I drain it?
Whey is the watery liquid that separates from yogurt. It’s a natural byproduct of fermentation and can be stirred back in or drained for a thicker, Greek-style yogurt. Whey is rich in protein and can be used in other recipes.